Trackspec Roll Cage -- Installation & Review
As my C5 Corvette project ownership carries on longer, the Corvette is quickly becoming less and less of a street car and more and more of an outright track sled. At first for safety I simply trusted just them OEM roll protection. That of course wasn't significant enough, and I wanted harnessess, so I moved onwards to a rollbar... and while that works, it's a half measure. Now with the tracks I frequent I am regularly pushing speeds well into the 130's. Add onto that my recently added power, 140+ mph speeds isn't all that unlikely... and thus upping the safety factor yet again seems inevitable. Plus, I'll improve the rigidy of the chassis while i'm at it!
So a roll cage came to be on my winter 24/25 build list.
Taking a look at the options...but the kit from trackspec seems to be a no brainer choice. The price is reasonable and you'd likely spend more than that on metal and fabriactor time to cut up something not as well designed. The fitment is exceptional and maximizes clearance for the driver... and it's been crash tested in spec corvette to do the job.
Having helped install a cage on our Lemons Accord build, I knew just how big the tasks was and just how much fabrication and faffing around with fitment there was. So, knowing I was likely in a bit over my head I recruited the help of my fellow Lemons team member and career fabricator, Dave aka Groundscore. We both watched the pretty good videos Trackspec includes and then Dave joined me for a weekend of rollcage installation. It's worth noting now... this job takes more than weekend as there's a lot of minutia that comes after the cage itself is welded into place.
Important thing to note, if doing this yourself... this isn't a terribly good job for the inexperienced. There's a fair bit of tools you'll need to do the job, and learning on this runs the notable risk of possibly damaging the cage rendering it worthless. We also had to do a fair bit of custom work, and there's a bunch of tools that your average driveway or garage mechanic won't have.
Some stuff we highly recommend for doing the job:
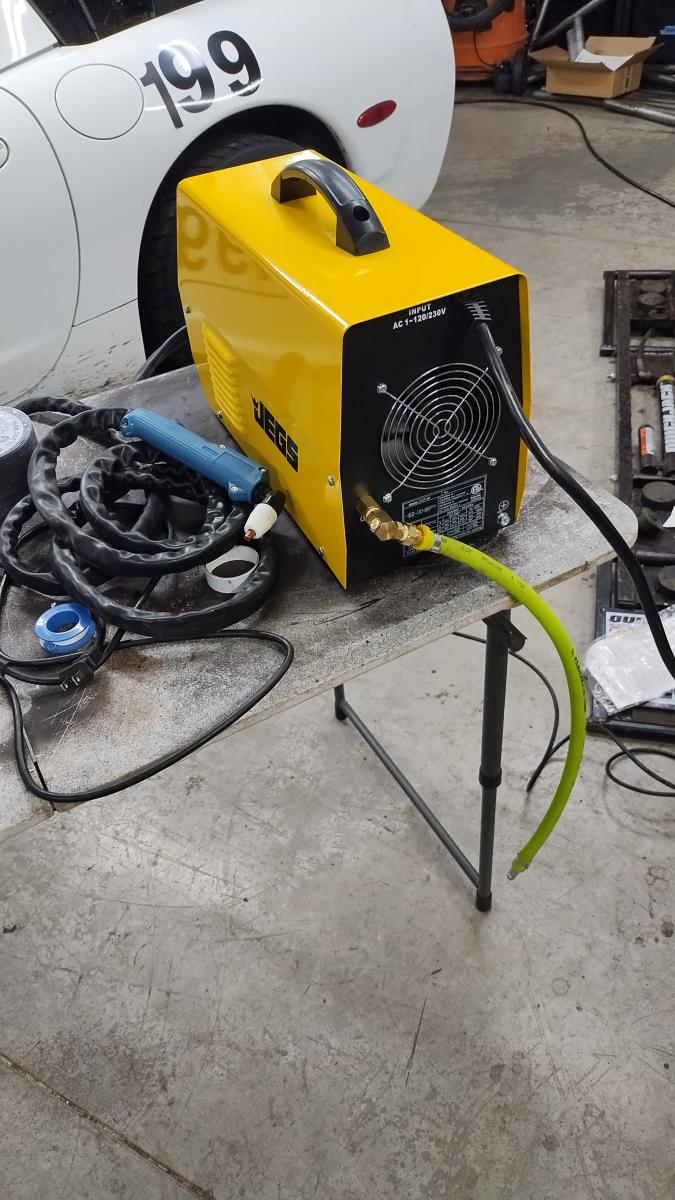
- Jegs Plasma Cutter - Having a plasma cutter makes this job MUCH easier, especially if you need to do anything custom like the tabs for the Targa top like we did. This plasma cutter is CHEAP and WORKS, and even harbor freight doesn't have one this cheap and functional. It also runs on 110v or 220v, making it pretty flexible in it's usage. You will need to get some air hose fittings, and remember this requires at least a mid sized air compressor pushing it.
- Welding Blankets - Since you're going to be welding in and around stuff and shooting sparks everywhere, these will really save your bacon!
- Welding and Spark Deflection paper - Yep, it's expensive, but gosh darn is it easy it to use to cover your windows and other various bits form damage from welding sparks.
- A 240v welder of your choice - There's a LOT of options out there. I have the Lincoln 180HD which works great for my usage, and can be found for $600 or so on Ebay making it competitively priced for a name brand quality welder, though I do recommend immediately updating the gun on it.. The most important part though is 240v. You need some hot sauce to weld thicker steel together, and you're going to be doing a TON of it so the higher duty cycle of 240v will really help you out.
- Push button momentary switches and ready to wire-in wateproof plugs. You're going to want to add a push button for at least the gas tank and the rear hatch, and I added one for TC just incase for some reason I need to cycle it off even though it should just be disabled from the getgo. These two make life REALLY easy in combination to wire stuff in AND to be able to unplug it in the future if you need to pull stuff out to work on it.
- You're going to want an angle grinder you can quickly swap out for grinding, cutting and flapper discs. You're also going to want an oscillating saw for quickly cutting through the fiberglass... and you'll want a shop vac to suck up all the dust while you're cutting. Don't forget a face mask while you're at it so you aren't breathing any of that gnarly dust in while you're at it.
- If you're ever going to get the simplified and removable door hinges for the Corvette... now would be the time to get them as it will vastly increase ease of access for working on the cage.
Starting to see why this isn't just your average garage mechanics level task?
Cage Installation
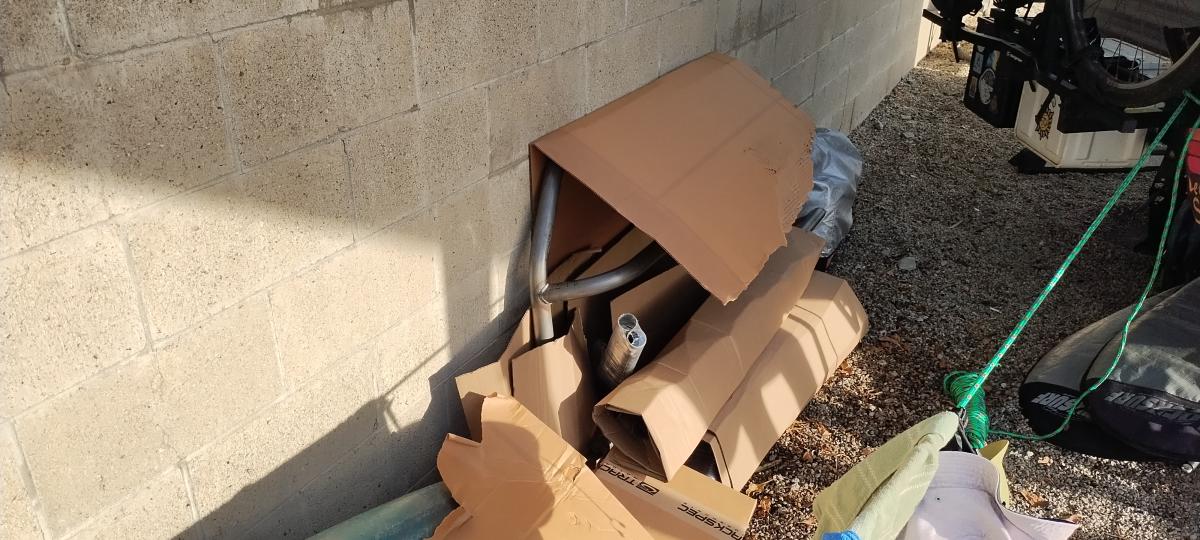
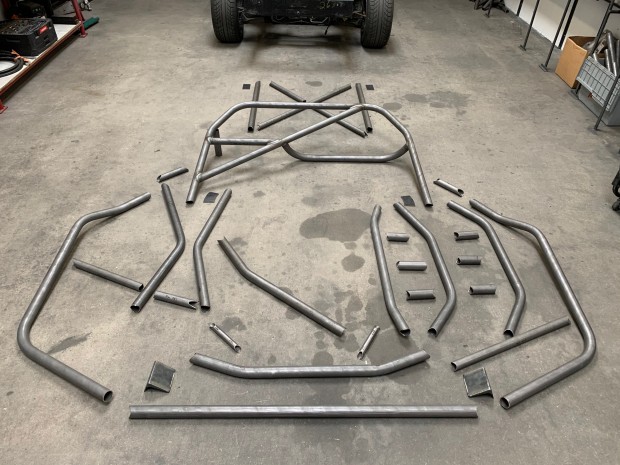
I picked the roll cage up direct from Trackspec in California. I was already down in Ventura area for a surf trip and to get away from the rainy PNW for Christmas with some friends, so this saved me $300 on shipping. That combined with black friday pricing helped make this cage quite reasonable for me to go. My wife and I popped over to Universal studios, and then afterwards drover over to pick up the cage. The choice to pickup the cage on my trup unfortuantely resulted in a bit of a headache, as I drove back to the PNW with the cage flat in my truck bed and if you know the PNW and winter... that means RAIN! The cage being raw stee all got a bit rusty, and when I cleaned it all up I lost a lot of the markings for lining up the various bars and what not for the cage. DOH! We managed fine without the markings, but it did make my life harder.
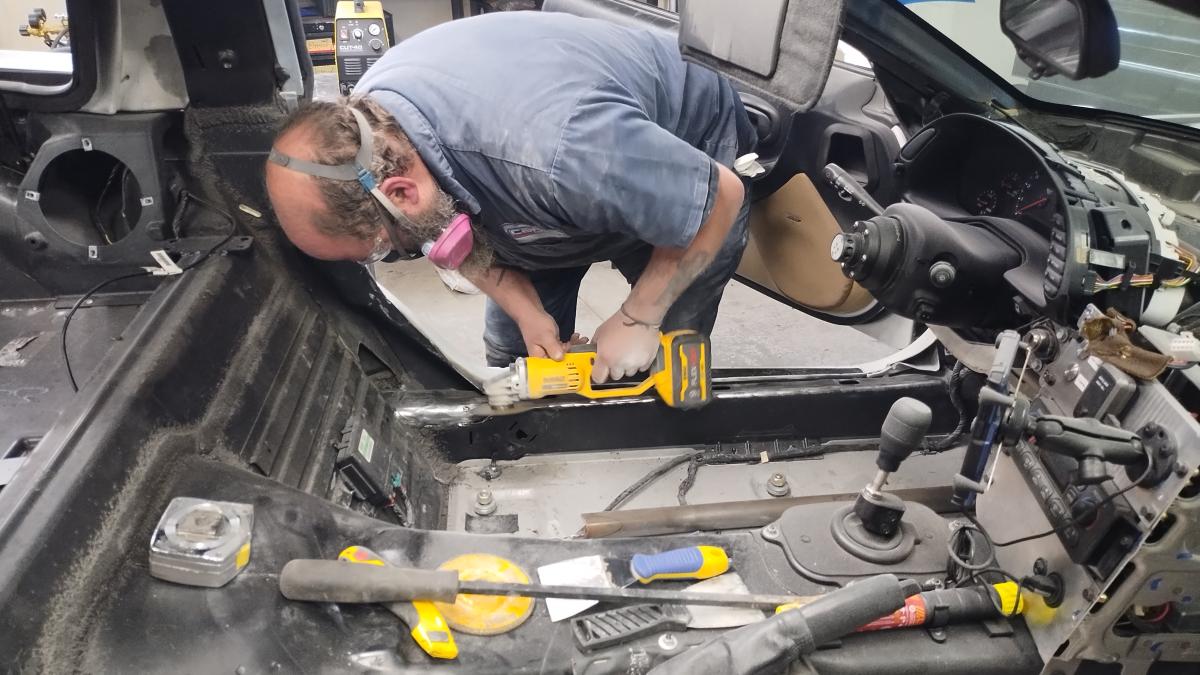
I tackled the initial work of gutting the car the remainder of the way to ensure when Dave popped by to help me out. Having the car gutted ensured he wouldn't be faffing with annoying little tasks like pulling the dash or any other such tasks. It also helps I had already gutted a lot of the car for weight loss, and had made a lot of choices as part of that process for ease of access. Thus, with everything removed, Dave was able to get right to the initial task of cutting out where the main hoop would eventually drop down into the frame to allow welding the top of the roll cage. Speaking of, if you ever wondered how folks welded the top of the roll cage... that's pretty much exactly how! We'll have a good picture example later you can check out.
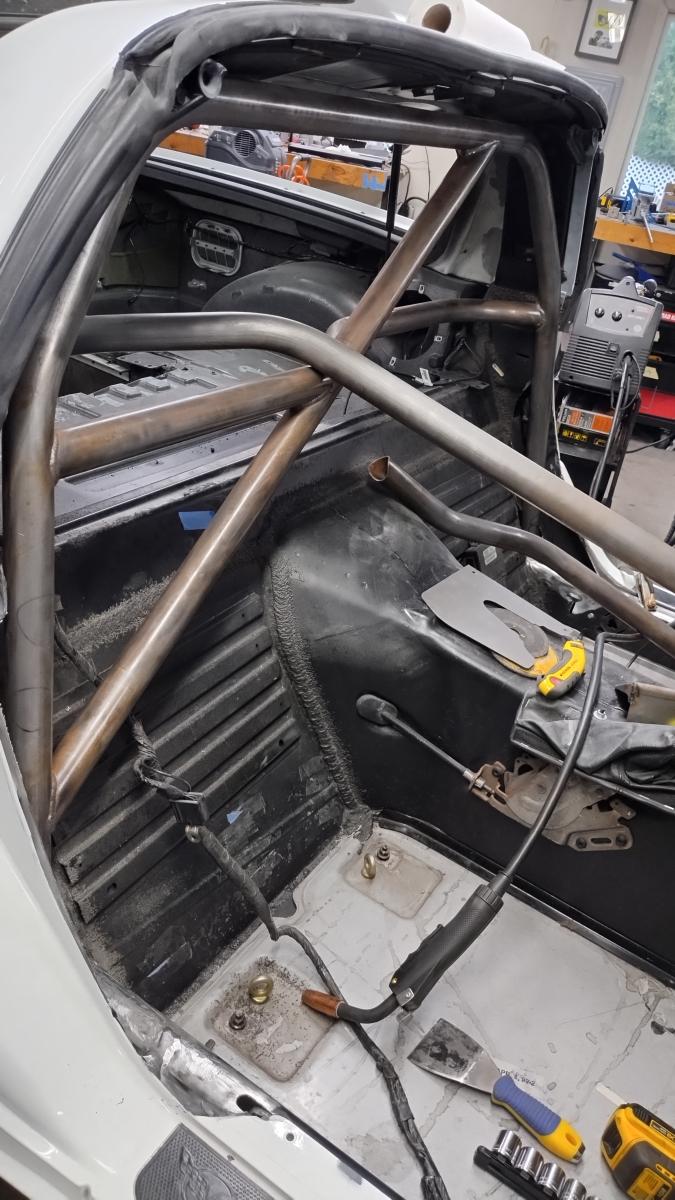
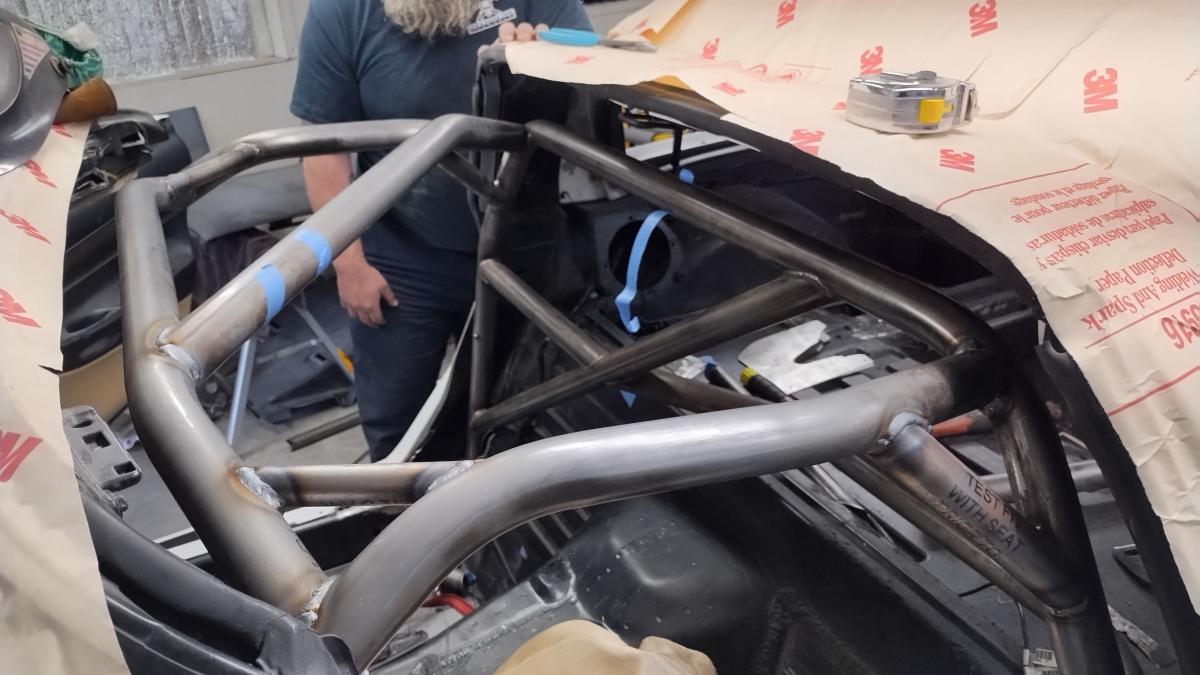
Above you can see the main hoop of the rollcage in place. Nothing terribly exciting, but the first initial part of the project is well underway!

It's worth calling out now that having some sticky welding paper to cover your windshield is critical to preventing it from getting a bunch of small craters in it from welding spatter. A welding blanket will also make quick work of protecting anything up front you kept in place.
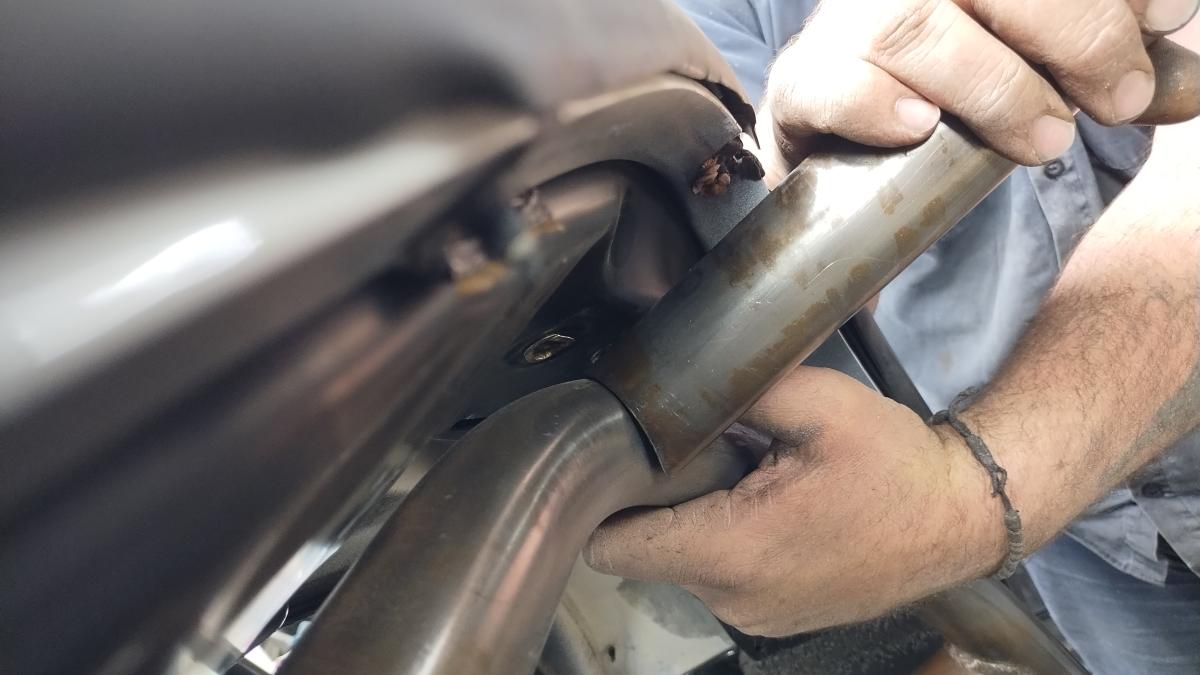
Her you can see where the "windshield runner" attaches to the main hoop. We spent a bit more time finagling to get a near perfect fit, which took some time as the rusting of my cage resulted in the loss of all the markings on the main hoop.
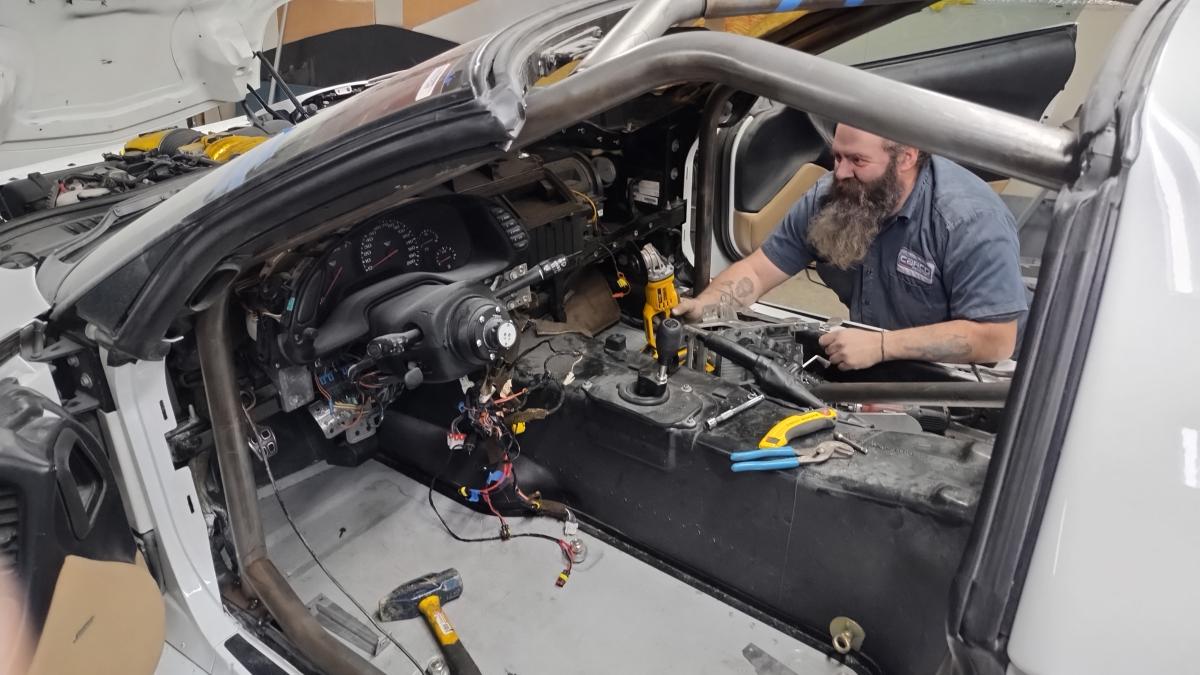
Here you can see Dave taking a look at the cage during our initial test fitting. The windshield runners are in place, the lower door bars are in place... it's coming together but there's a lot of fiddling, tacking, fiddling, grinding out tacks, fiddling more, tacking again... lots and lots of that as you work to get everything just right.
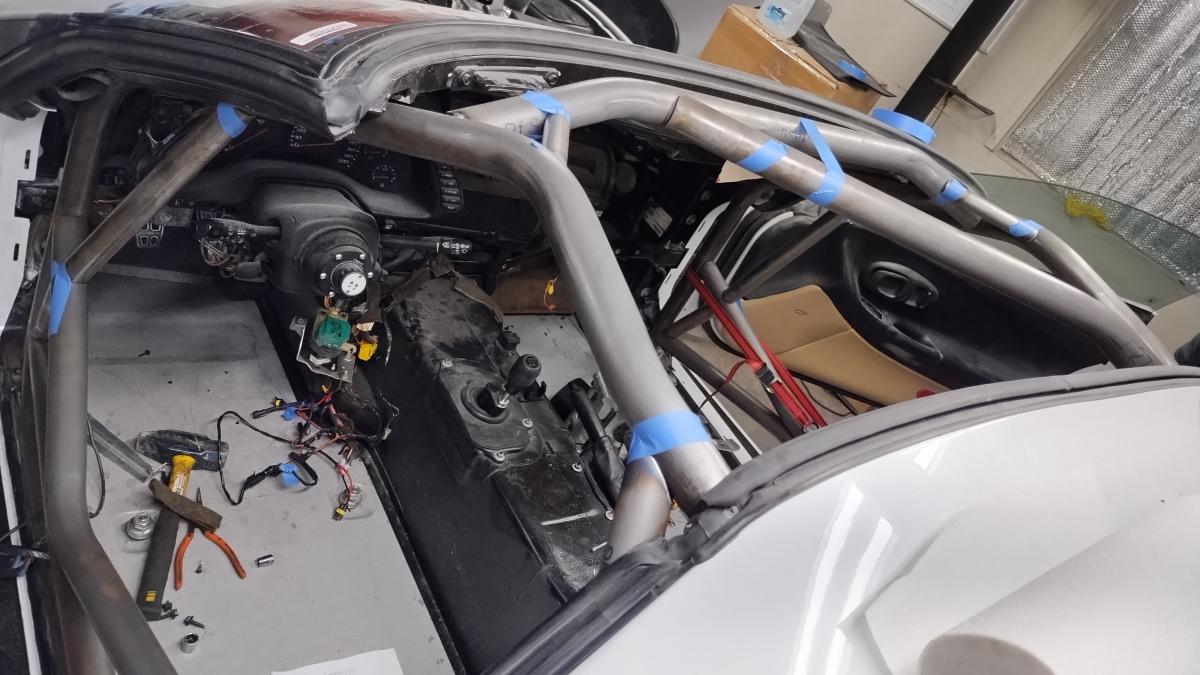
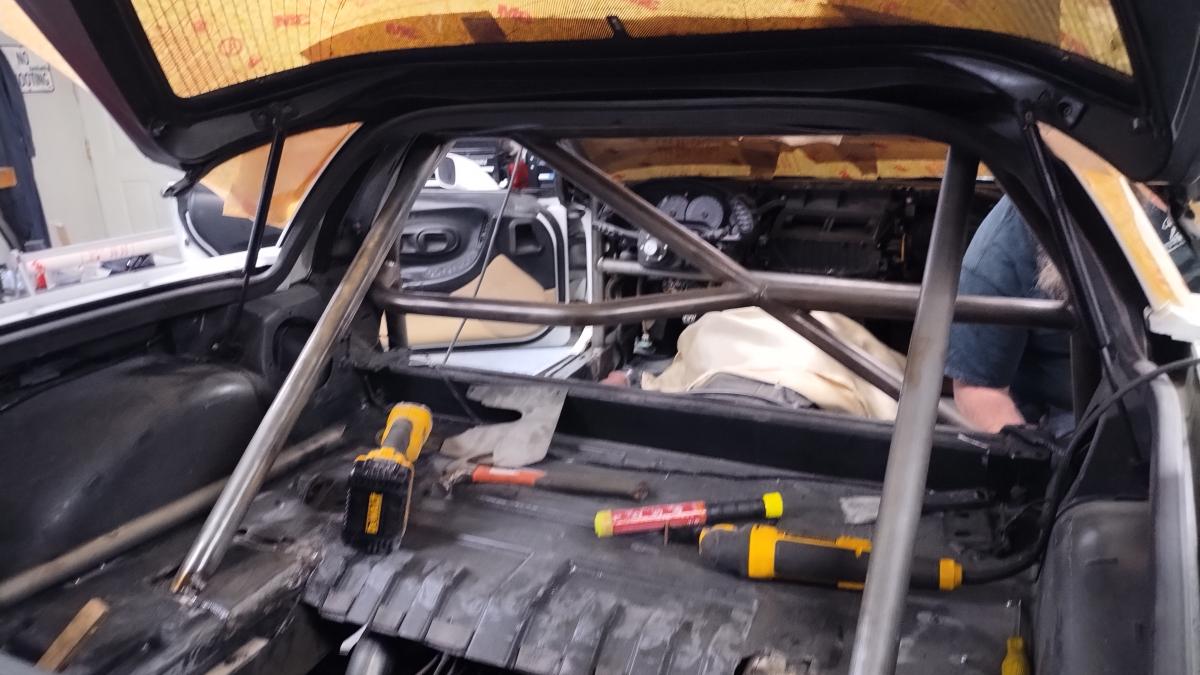
Here's the roll cage front half fully tacked in and held in place with some tape to ensure initial fitment is good.
Overhead view of cage tacked in plus taped together for test fitting.

The directions say it's worth testing that your seat fits at this point, and sure my Racetech 4100W the seat fits with lots of room to spare. It's also a rather large seat, so i fancy you can fit some pretty sizable seats in the Corvette even when using the X-bars instead of the nascar style bars.

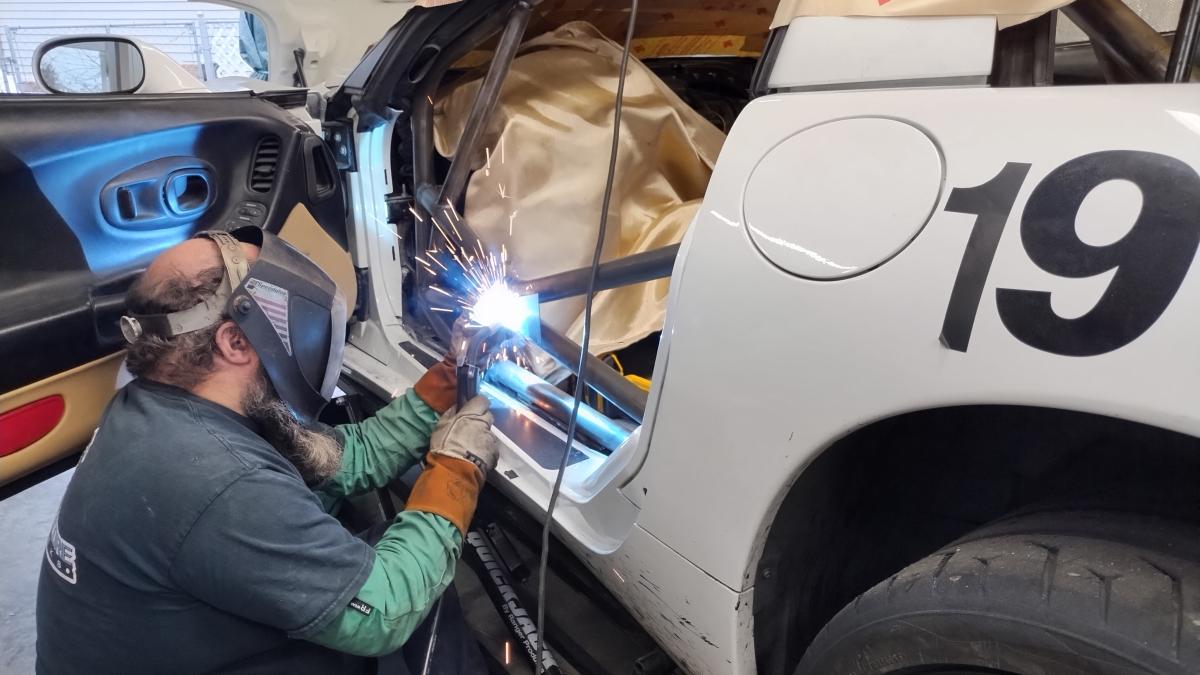
Here is Dave doing some welding on the front half of the rollcage after we confirmed testfitment worked. Note the gratutious amounts of window welding and spark deflector paper. Gotta protect the paint and windows!
...and just like that, the front half of the roll cage was welded together and installed. In the current picture, we had removed the rear plates to allow the roll cage to drop down into the holes we initially cut.This gives us great access to weld the main hoop to the front window runner along with the roof reinforcement bar and any other bars that would be hard to access when snug against the roof.
So what you see here... was a mistake! We put the rear braces in first... which in hindsight was dumb but we were covering a lot of ground quickly. we would later bust these tacks off, weld up the rear X member first, then test fit it all together at once based aroud the X-member and tack it in. It's also worth noting that somehow we misplaced the rear plates. Insteda though we cut up some 1/8" steel plates and plated the entire rear shock tower in and attached to that. Now the car is that much more robust and we have more plate surface area.
Here you can see Dave welding in the box for the doorbars. It comes in a bowtie style shape with side plates as well that all fit together like a glove and reinforce the door bars. Solid stuff and it looks clean as well!
Dave welding in the door X-bar plates.
Here you can see some of the yoga Dave had to performed to access a few parts of the cage for welding. I paid Dave for his time and he earned every damn penny of it!
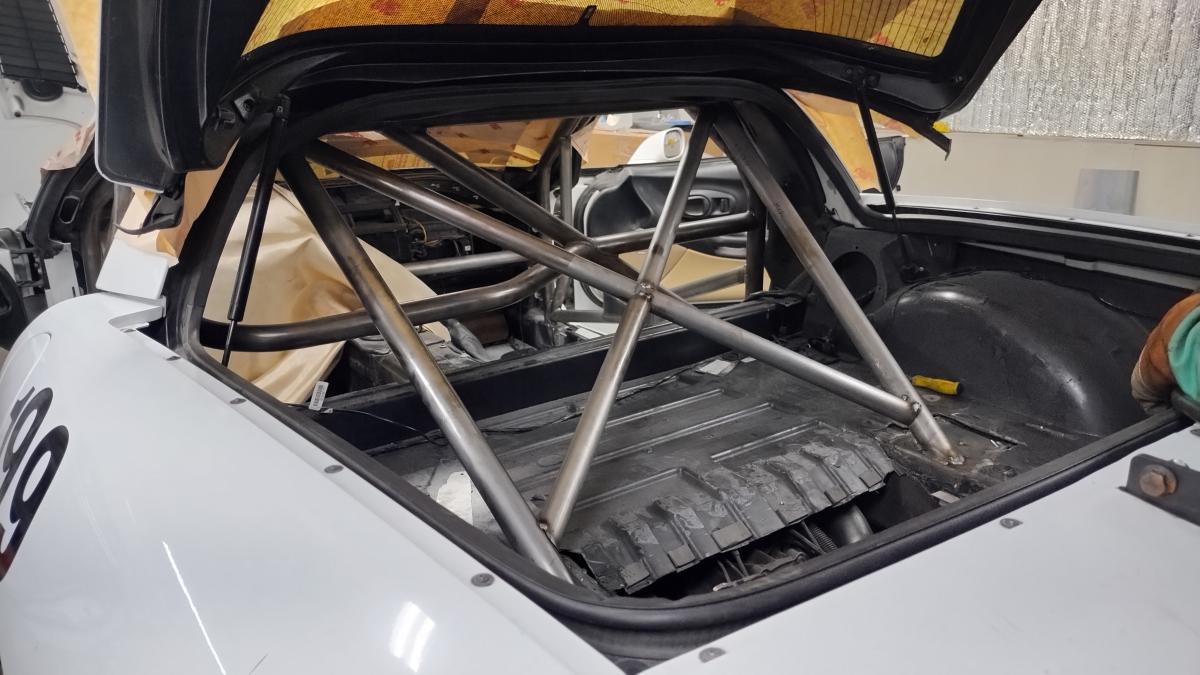
Here is the rear braces with the X bar in place. As discussed above, weld up the X-bar first, then fit it all in place, tack it in, and if it's all together nicely you can wrap it all up. This was a breeze to do when done this way, and I bet it even tells us to do that in the directions. We forgot and just started freestyling it. Somebody at Trackspec likely read what I've written about all this and shook their heads.
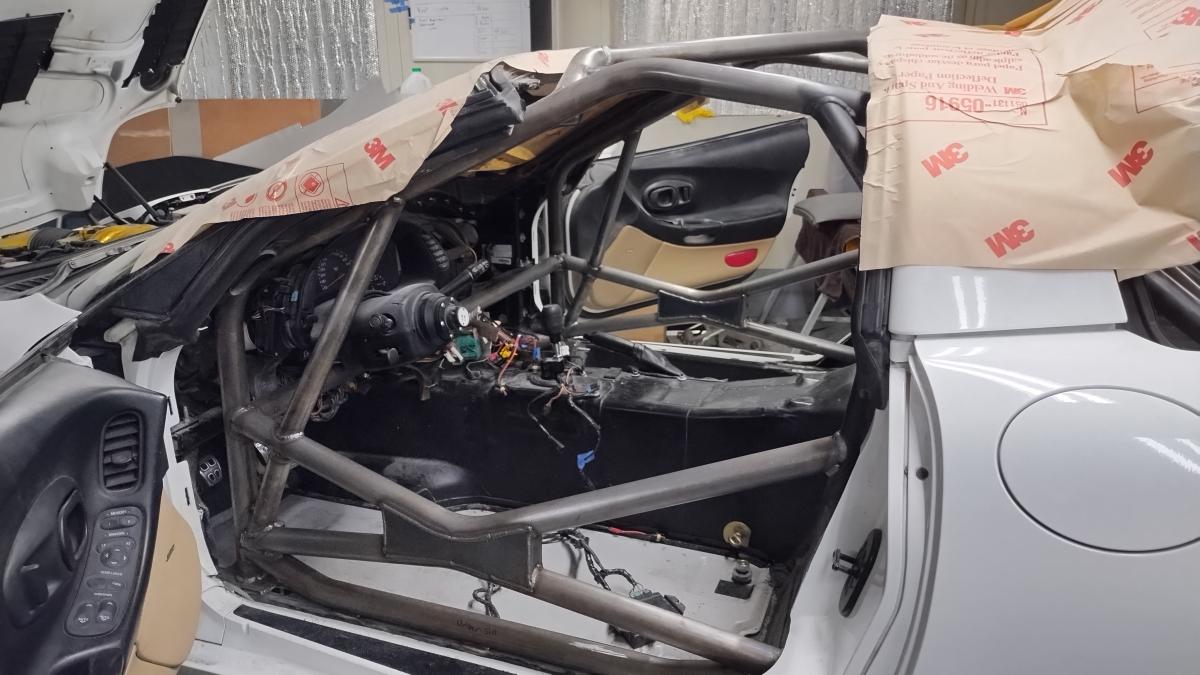
Here's the completed front section of the cage for youre viewing pleasure. Door bars are boxed in, everything in place including FIA bars and the dash bar. It's a solid looking cage and all welded up!
It's worth noting at this point many folks would assum the job is done. The cage is in after all right? What's left to do.
Welp, there's a bunch of small stuff that all adds up.
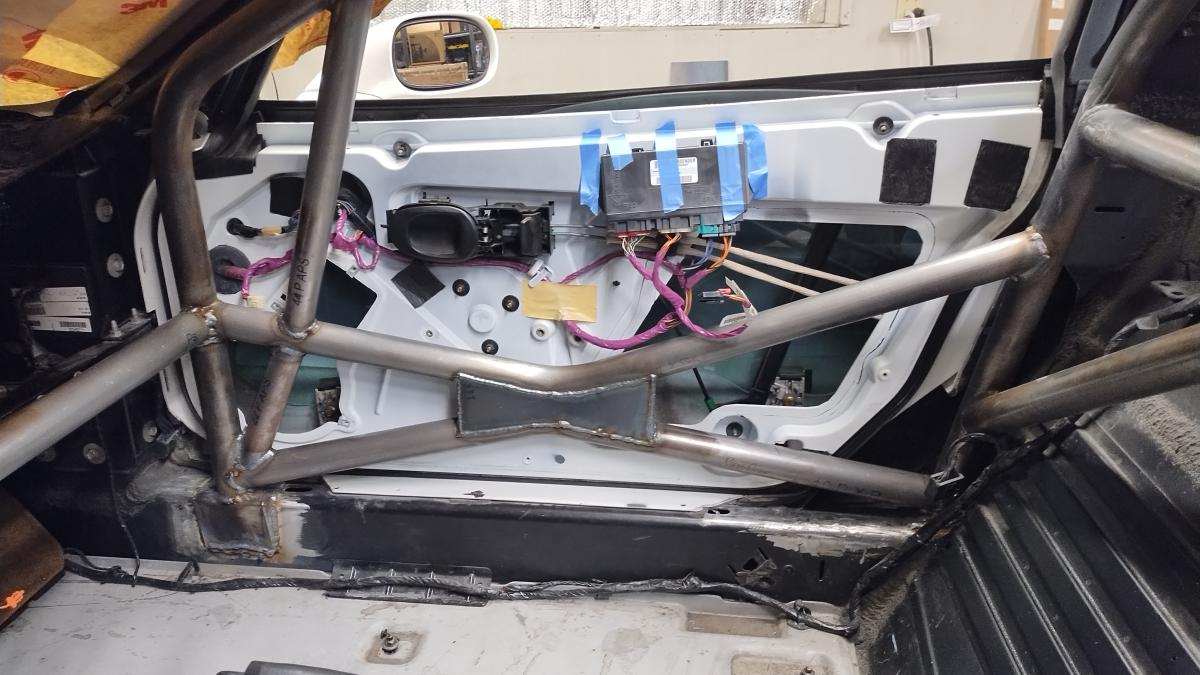
First and foremost, I couldn't get even close to closing the door with the door cards in. So, I yanked them, and even then the cage just barely makes contact. I actually traced the two areas where the door makes contact in sharpie in the picture above, hopefully you can see it. If not though, the next picture surely makes it obvious. If you are curious about doing this yourself it's really easy. Pull the door closed from inside, grab a sharpy, trace around the area that makes contact. Easy peasy.
Here you can see the two areas I cut out of the door to work with the door bars.
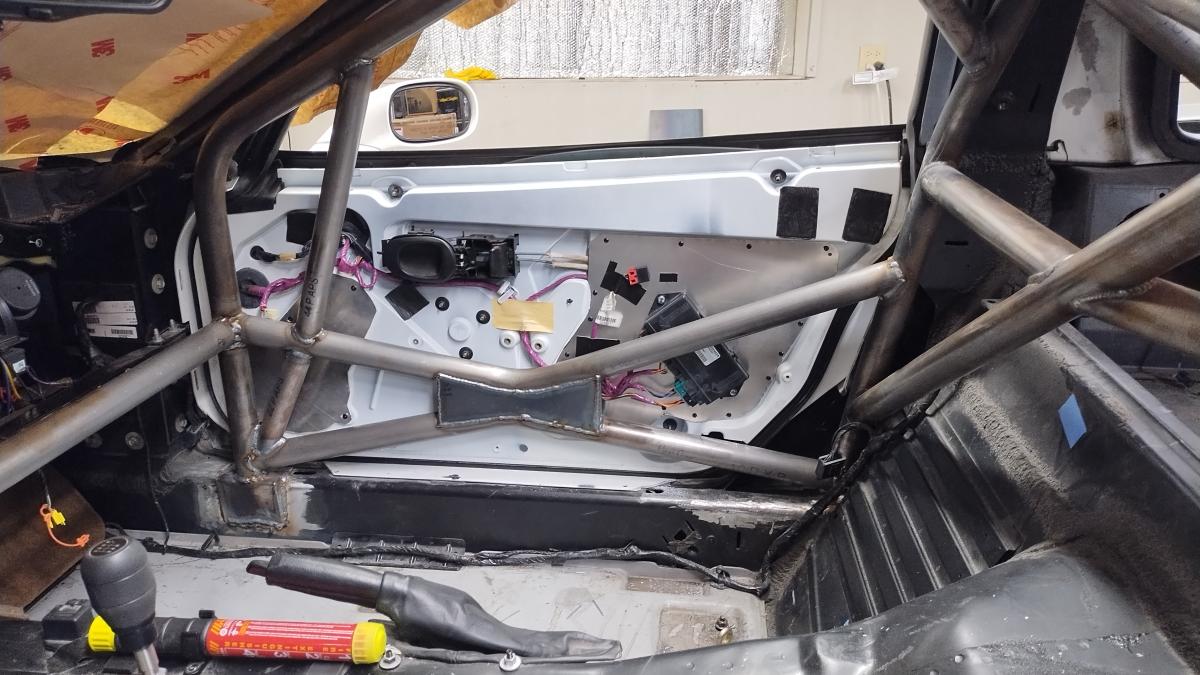
...and here is the door closed with the cutouts in place. Notice how you can't really see them? That's intentional. Since I will be keeping my glass, I don't want anywhere for glass to be able to enter the car in the event of an accident. Speaking of though... what about those two large holes from the factory in the door?
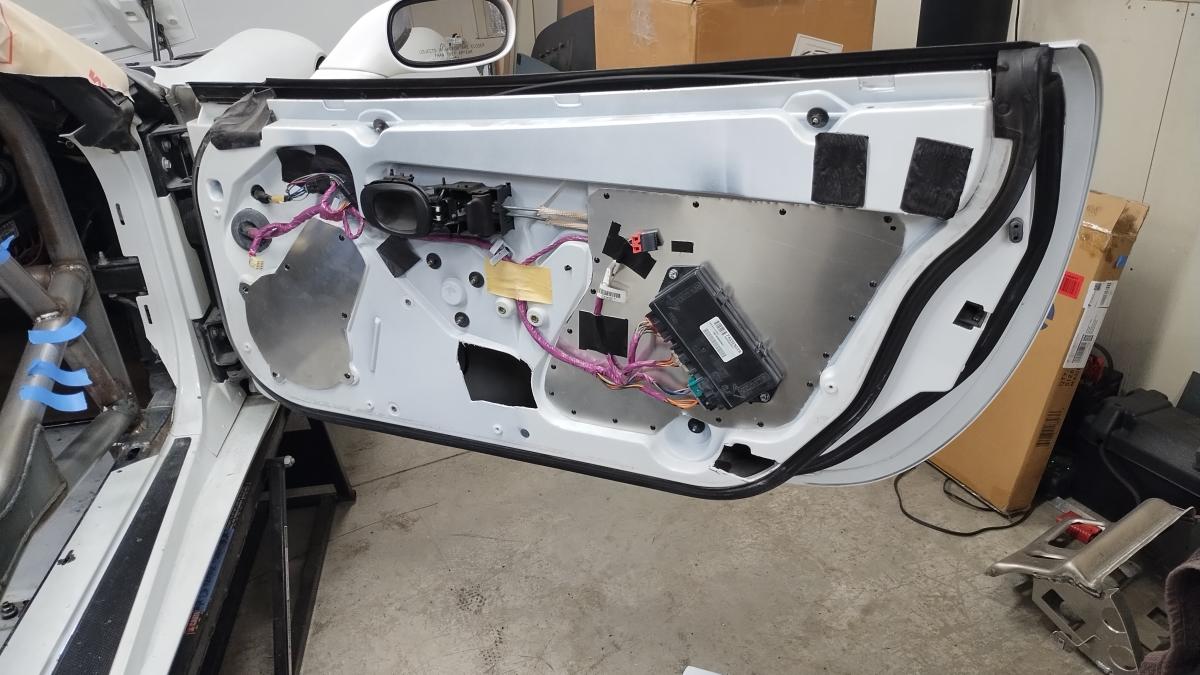
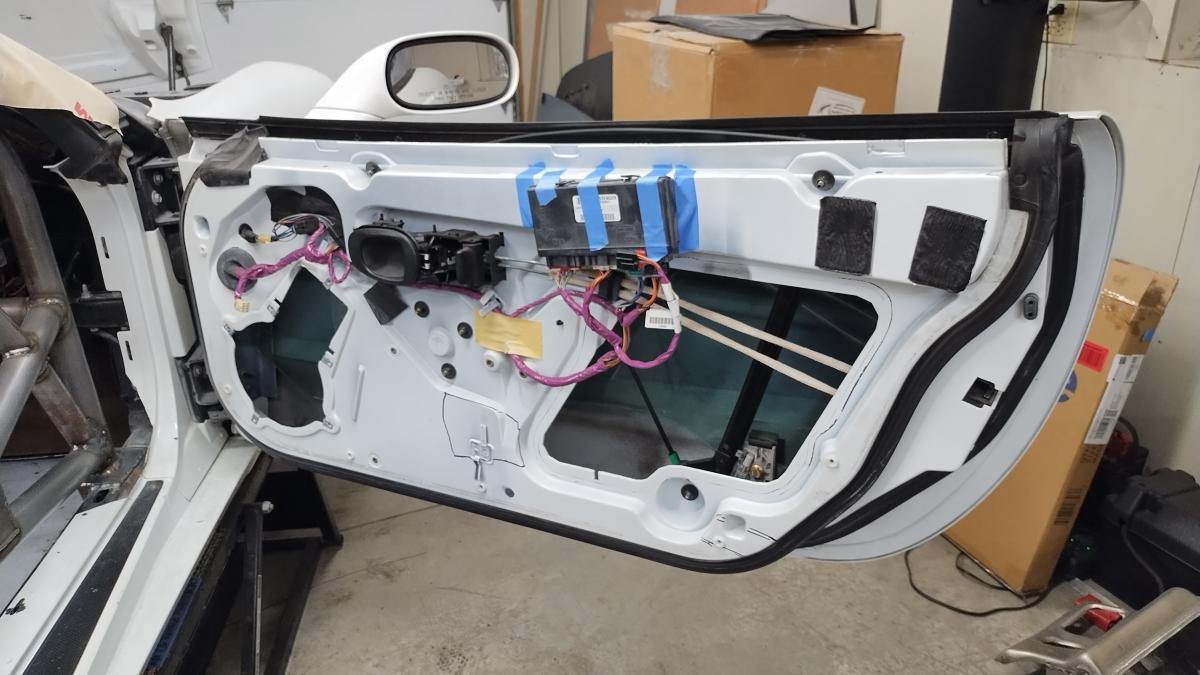
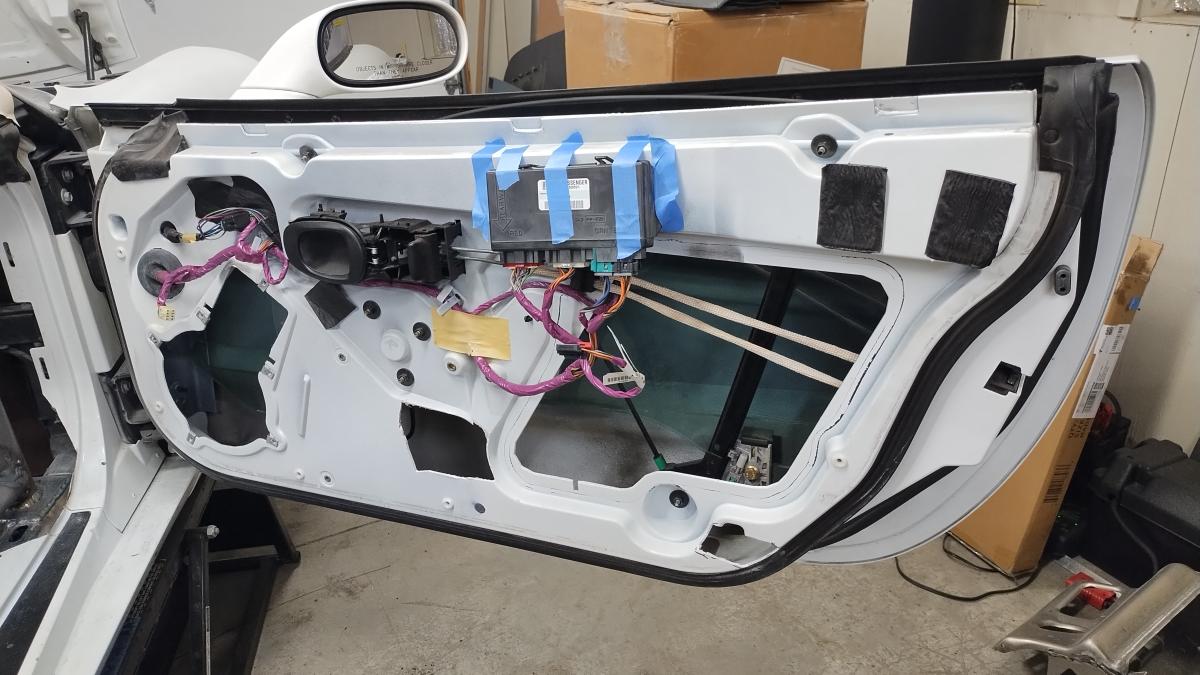
Utilizing clear plastic, I traced the shape of each opening in the door and then pop riveted on some sheet aluminum. Simple and easy protection! Plus it gave me something to attach all of my various controls and what not to.
Here you can see the door closed with the plated over factory openings. A whole lot safer against broken glass entering the car in the event of a side collision.
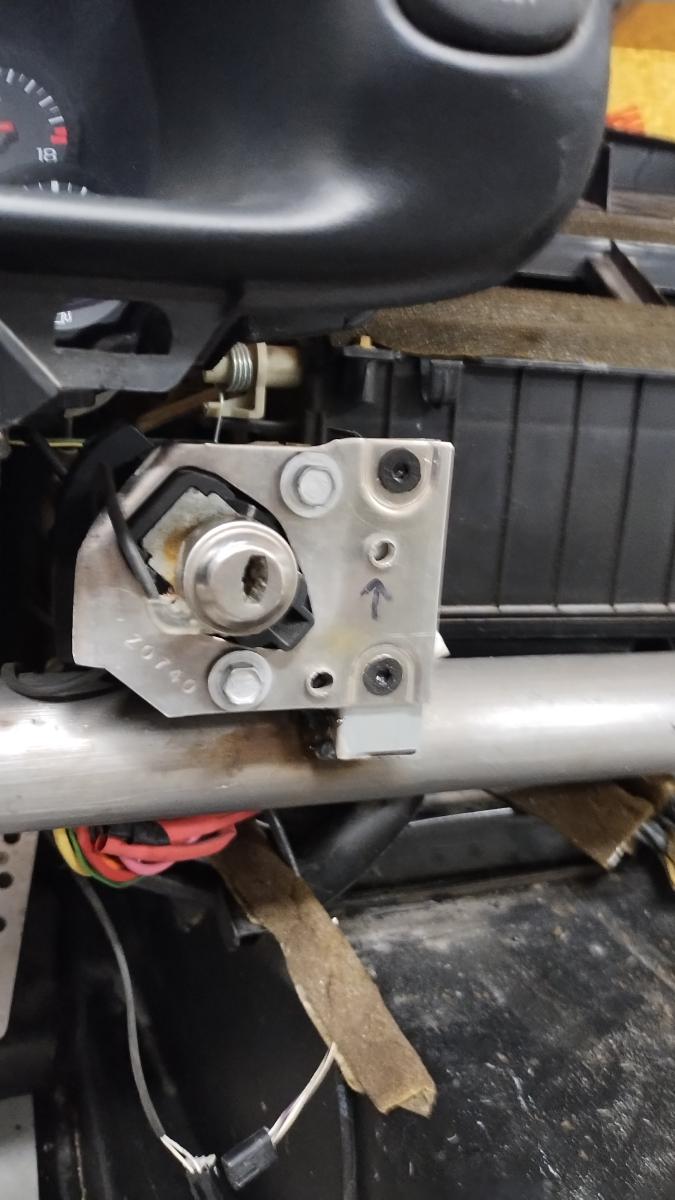
So here's a bit of the minutia you need to cover after installing the cage... where does your ignition go? The dashbar is right in the way, so what are you to do? Welp, I cut up some angle iron, welded it in place, added some rivnuts to it, and now I have a place to secure my ignition. Plus it's removable if for some reason I need to remove the ignition. Success!
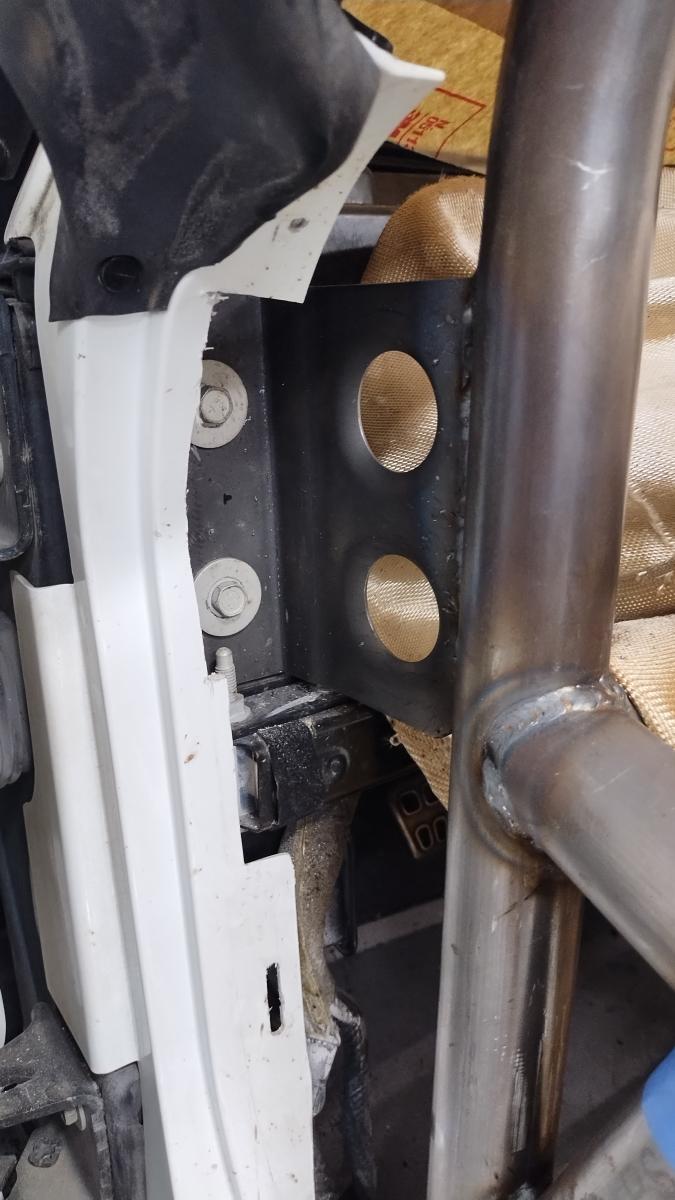
So after the cage was in Dave noted a few places we could further tie the cage into the car to add some rigidity to the chassis. Here you can see up front how we've attached the cage to the upright where the windshield is bolted on. That whole area is pretty stiff to survive a roll over... so tieing in there helps a fair it!
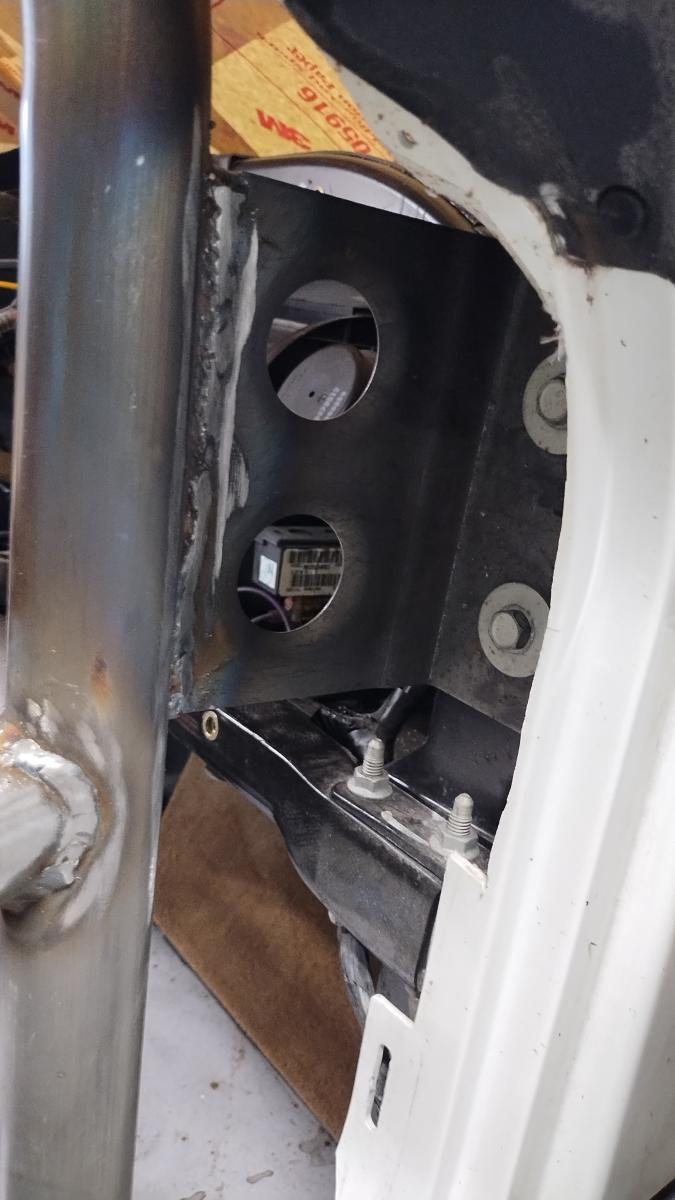
Here's the passenger side plate tie in. I don't really have a good term for this, but we expect it to add some notable rigidity.
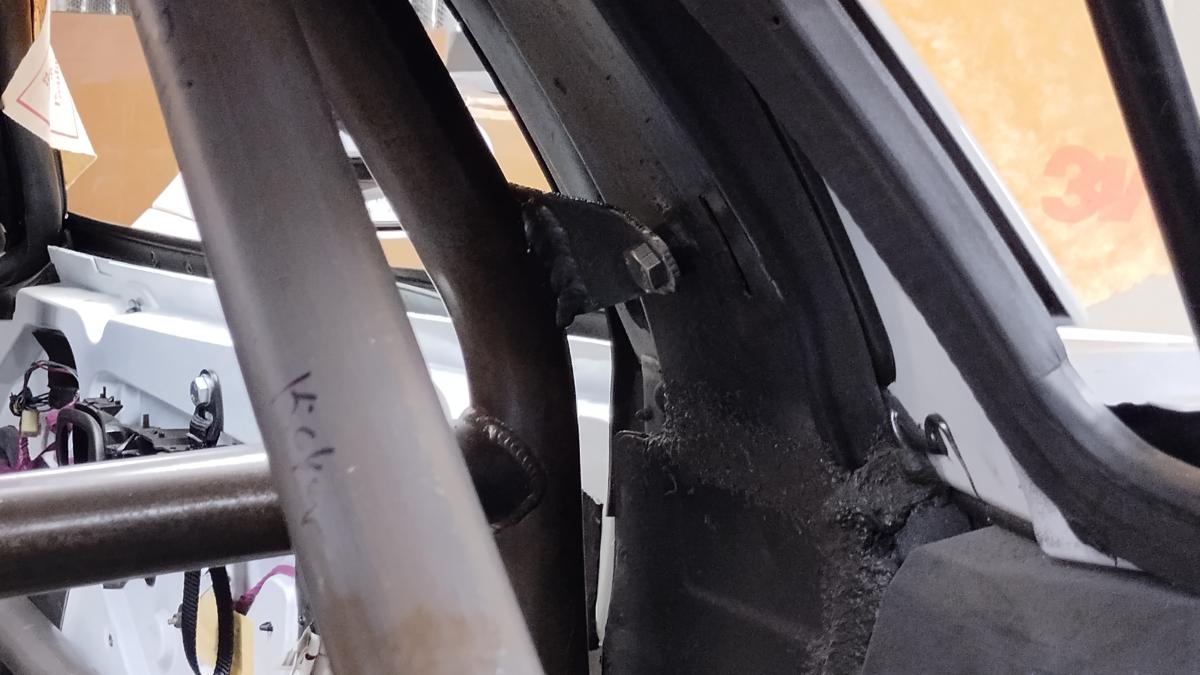
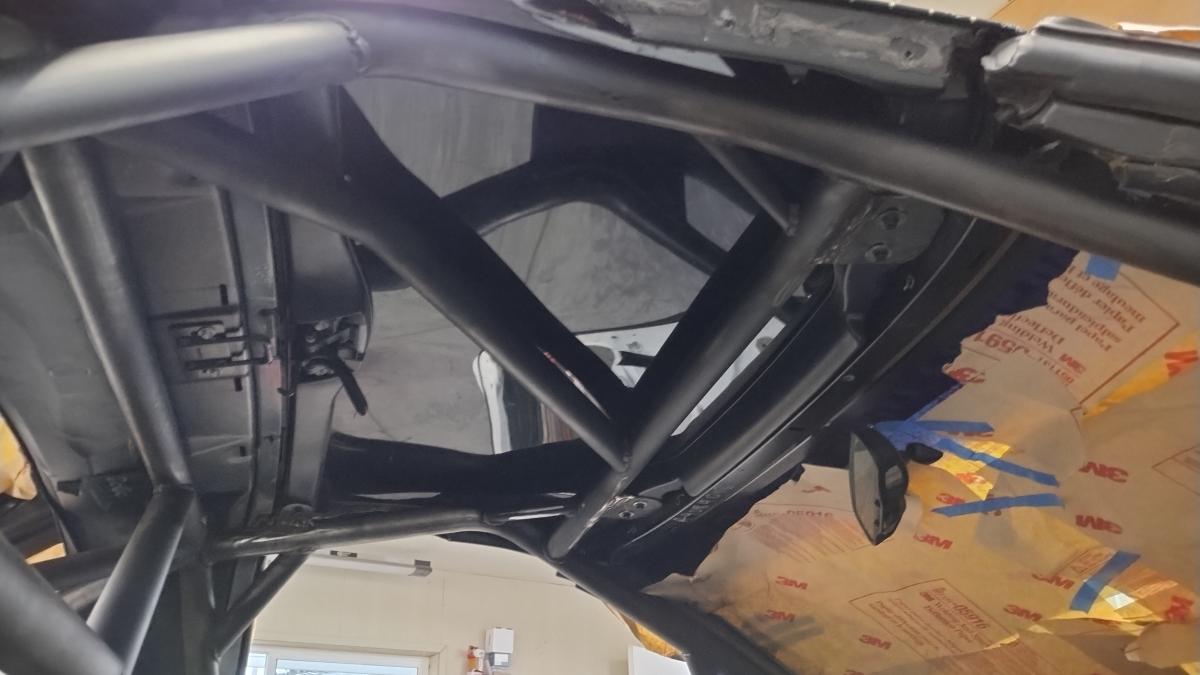
Another location we figured we could add rigidity is that the factory halo had some beef M10 threads for attaching the upper retractor of the factory C5 seatbelt. With the plasma cutter we just cut out a little section, hammered it to have a nice bend that matched the offset of the cage... and welded on a tab to tie the cage into the halo. Here I don't think we're gaining much rigidity since the rear braces tie into the frame pretty nicely, but eh this added maybe a 1/2 pound of steel for the chance at some extra rigidity, so why not?
At first, the Targa top didn't look like itw ould fit, but I trusted it was going to be a problem I could navigate. Turns out, with some shaving down of the aluminum frame the glass Targa top attaches to, I was able to easily get the Targa top to sit flush! The factory affixments however... I wasn't so lucky with those and I'd need to make a custom solution.

Utilziing the Plasma cutter again I welded on two tabs up front that bolted directly to where the OEM front latches attached. I slotted the hooles so there was some play to make sure everything fit happily, and I'll be attaching the Targa top with some hefty fender washers to ensure things are very solid. I'm confident this is far more robust than what originally came from the factory.
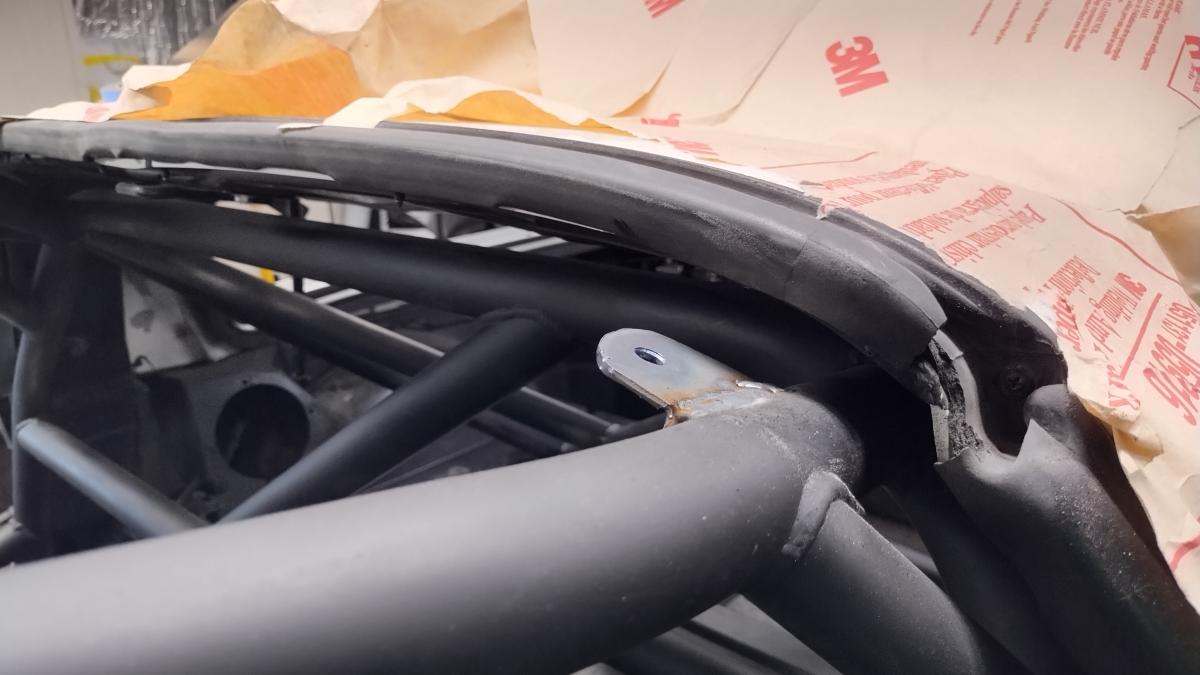
Next up was the rear mounts. You lose the factory side bits the targa top goes into and there isn't any factory here to tie into. Fortunately, the aluminum in this area of the Targa chassis is quite thick, so I drilled some holes, popped in some rivnuts, plasma cut the tab pictured and welded it onto the rollbar. Easy enough!
One little trick I did for adding these tabs was I bolted the tabs to the targa top first and plopped it on the cage. To makes sure though that the targa top was snug I put a very small washer between the targa top and the tab, ensuring when I did go to tighten the targa top down it would definitely have tension.
Here you can see the tabs in action from the bottom of the installed targa top. Simple and straight forward. Also, yes that is a glass top I painted black so I wouldn't roast like I'm sitting in a green house. I probably wasted some money doing that instead of getting a fiberglass top and selling my perfectly fine glass top, but I have yet to see a black fiberglass top so eh, it is what it is.

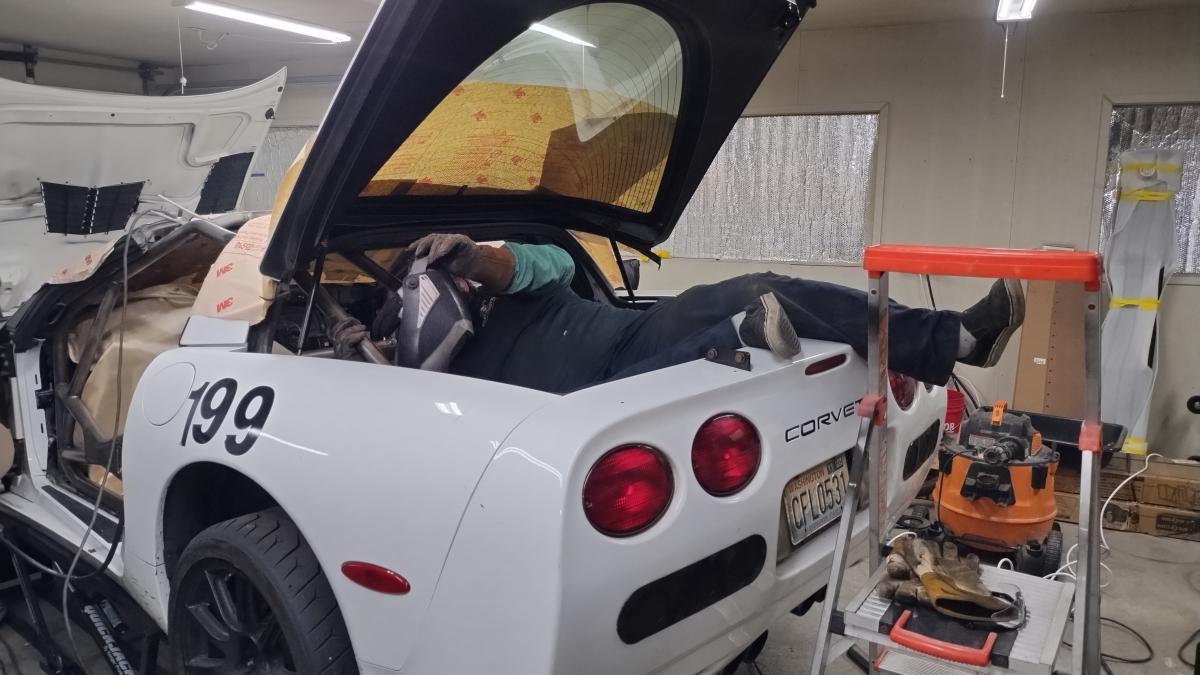
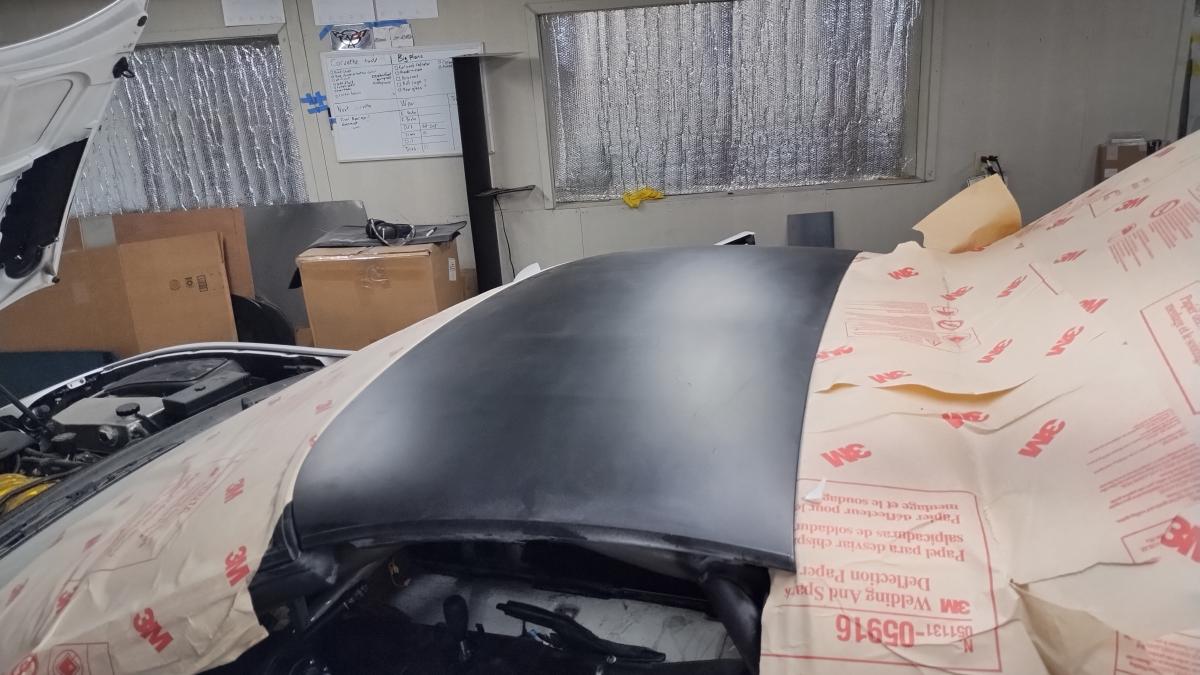
Lastly, after you've faffed with all the sidequests and electronics stuff you'll have to tackle such as adding an intermittent switch for the rear hatch opening and getting rid of a bunch of unneded wires and sensors... you've still got to paint the cage. Here you can see we used a ridiculous amount of paper and tape to help ensure we didn't paint the exterior of the car. We did several coats of rust encapsulator to make sure any of the rust form my road trip back to the PNW with California stayed dead (I did wire brush it all off) and then I did sevral more coats of Rustoleum flat black enamel coating. This cage has a very robust paint job on it now.
It's also worth noting the paint is drying here and still wet in some areas so it looks uneven. Wait until you see the final picture!
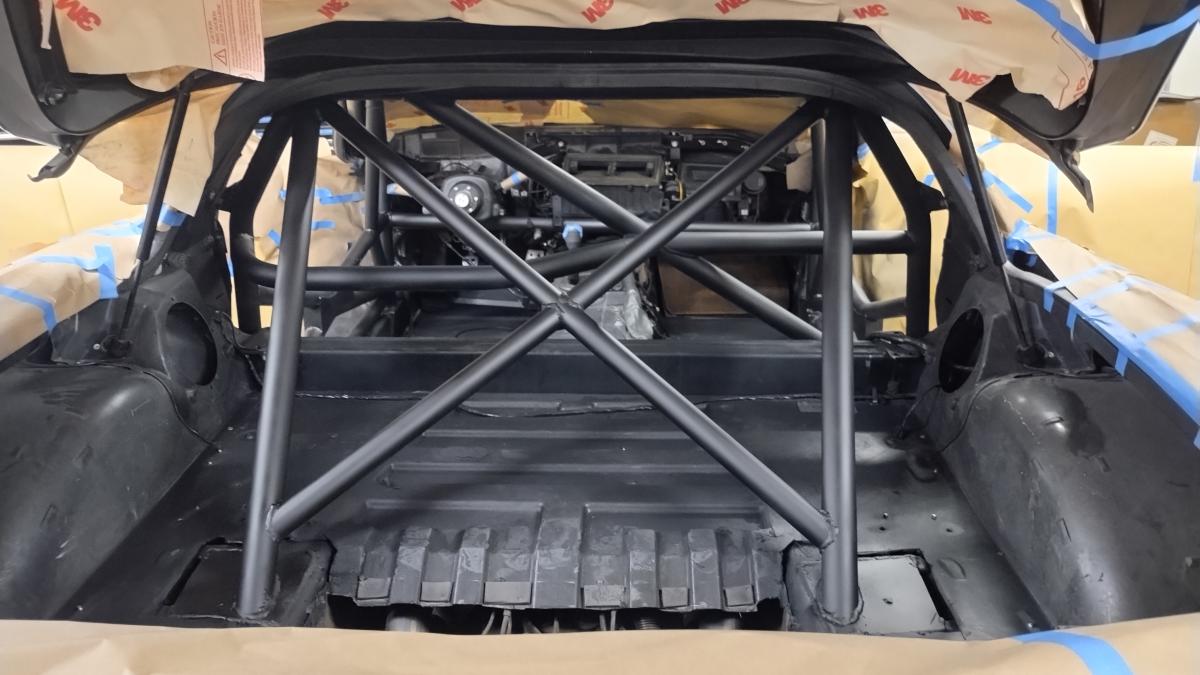
Here's the painted cage from the rear. You can also see the giant shock tower plates we put into the car. Overkill? Yes, more than likely... but sometimes there's just no kill like overkill!
More informaiton to come as I complete the cage and then test it at a track event!
Tasks remaining:
- Install plates along main hoop that seal off gas tank area as best as possible.
- Reinstall center console and gauges. Test all buttons still and function.
- Install ignition onto bracket I designed.
- Install seats.
- Install harnesses.
- Add roll bar padding where nescessary.
- Install Targa top now that everything is painted and in the car.
- Seal rear shock tower plate to fiberglass tub, and seal any other holes discovered along the way.
- Reconnect battery and see if everything still works as many grounds had to be relocated and redone and it's not impossible something got forgotten or isn't happy.
See, there's a lot of little tasks to be done that all add up?