Phase 1 -- Getting the Car Track "Worthy"
So the first phase of the project started simple enough, get the car on the track. We have an entire team with pretty much zero track experience aside from myself, so we needed to get everybody at least a smattering of seat time. We don't need to be experts though, but at least posesses a modest awareness of ones surroundings and general procedures like entering, exiting, point-bys, etc etc.
One thing kept coming up in my mind as the project got underway: don't be the team taht just guts the car and walks away. Too many lemons builds fail there I'm told. I don't want that to be us!
Fortunately for us, we went into the build with one significant advantage. Dave Groundscore of Groundscore Fabworks noteriety would be helping us build the car. Dave has extensive fabrication experience, to the point his catch phrase throughout the build was "It's like I do this for a living". Welp, the man does, and it really helped us get the car over the first hump of being a caged trackable car!
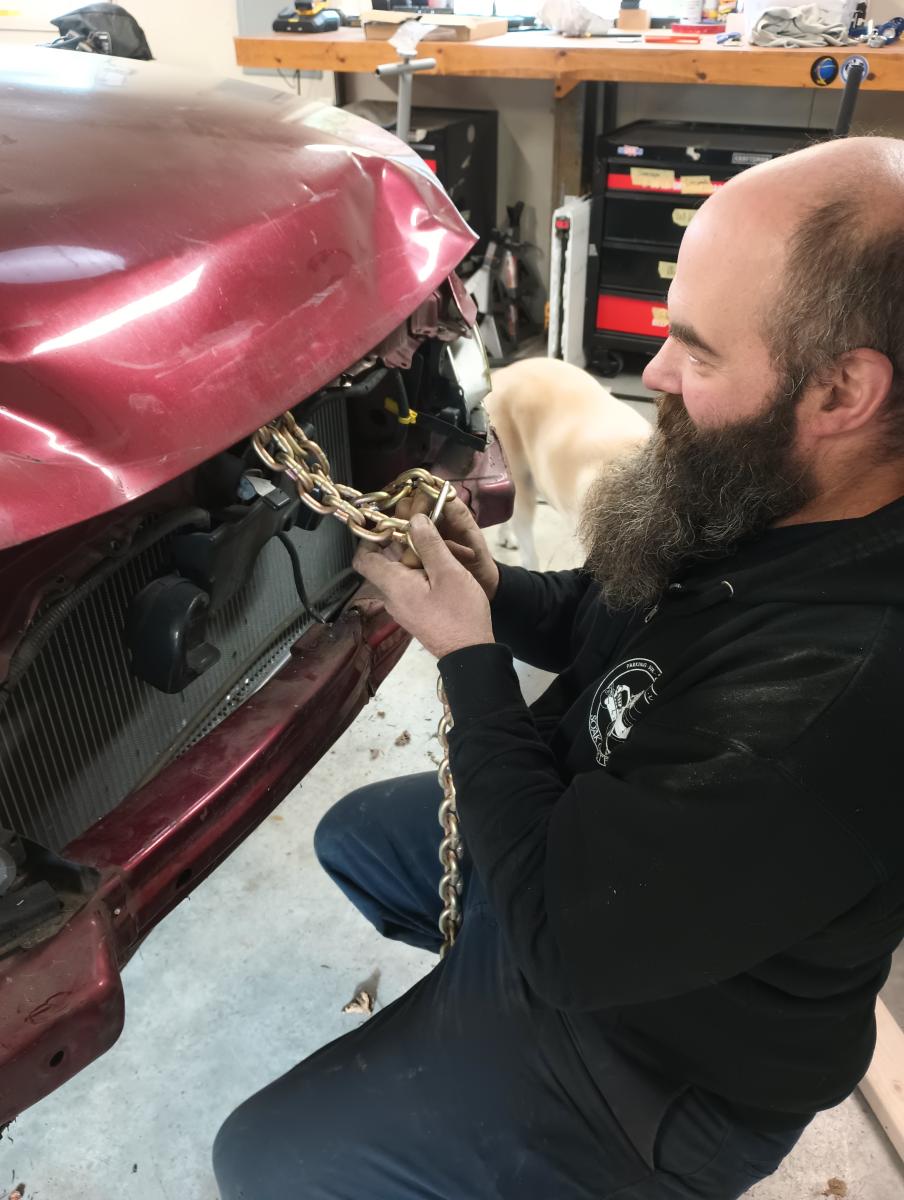
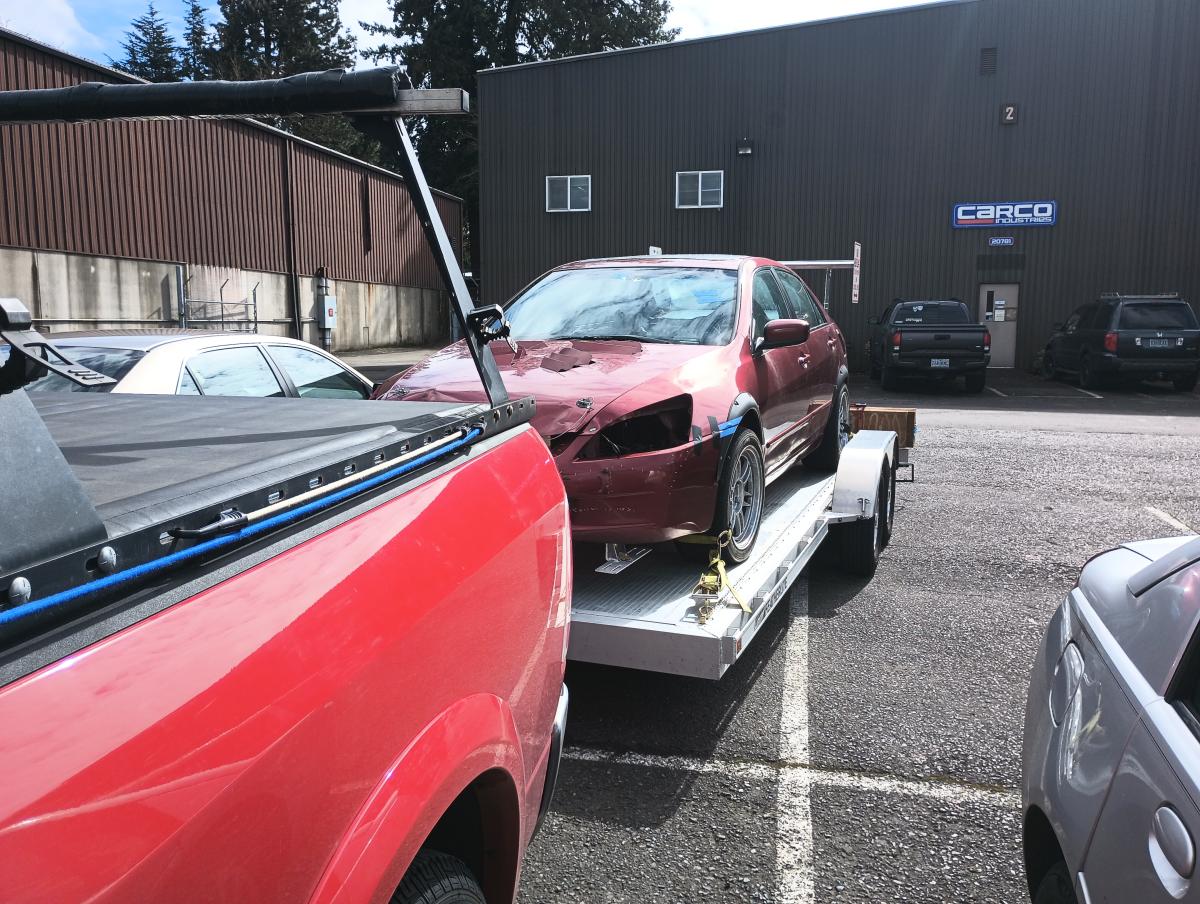
The first thing to address, was straightening out all the body damage and replace the front crash bar. While the frame of the car was perfectly reasonable, the front crash bar was entirely demolished and many of the attachment points or various connection bits were all smashed up. So queue the parts replacing and hammering as we worked to straighten the car back out!
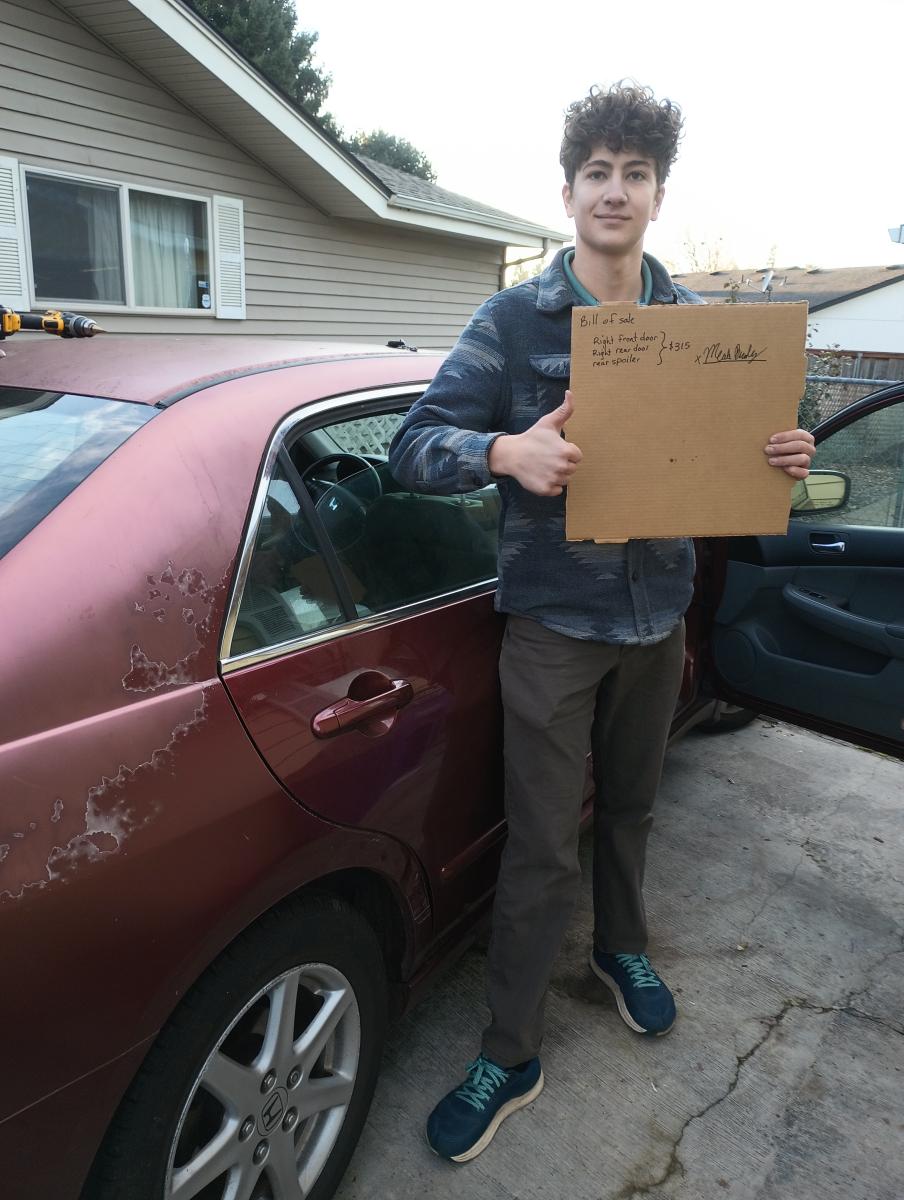
One fun part of Lemons is that while you need to stay below $500 in final value, you can sell the perfectly good parts off of your car to help free up money for other parts of the build. So we sold two car doors that were perfectly fine on our car and even helped install them on a Teenager kids car that he'd inherited from his grandfather!

Among the tasks we tackled early were simple maintenance tasks such as replacing the timing belt. The car still had the OEM timing belt on it, so that clearly had to go to be certain it would last as long as possible. This was a good learning challenge as only one of us had done a timing belt, and now we're all a fair bit more confident we could do future timing belts if need be!
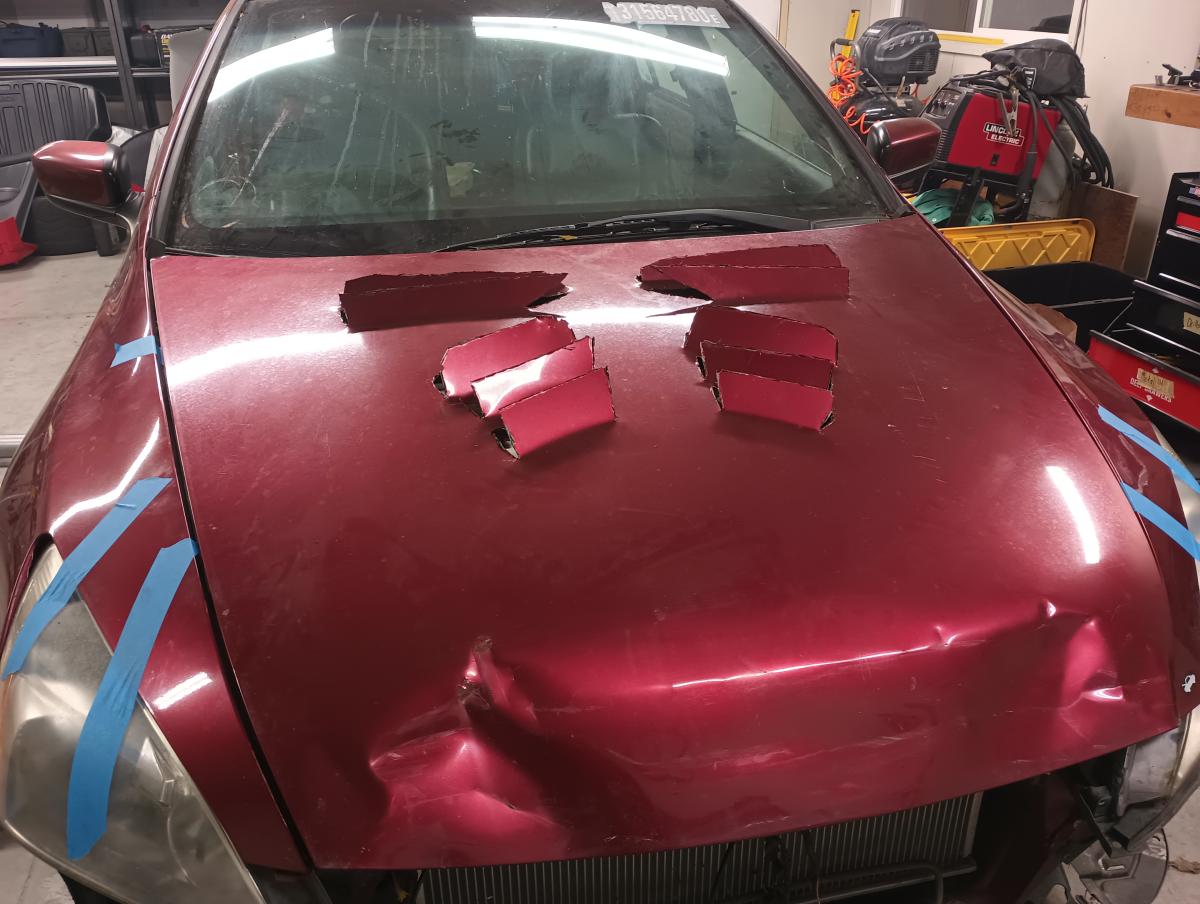
In the spirt of Lemons, I decided to do some DIY homebrew hack job modifications all myself. So I took it upon myself to cut some hood vents in the car. Nobody else was as amused by the cheese grater aesthetic this added to the car... but in my opinion, it's pretty spiffy!
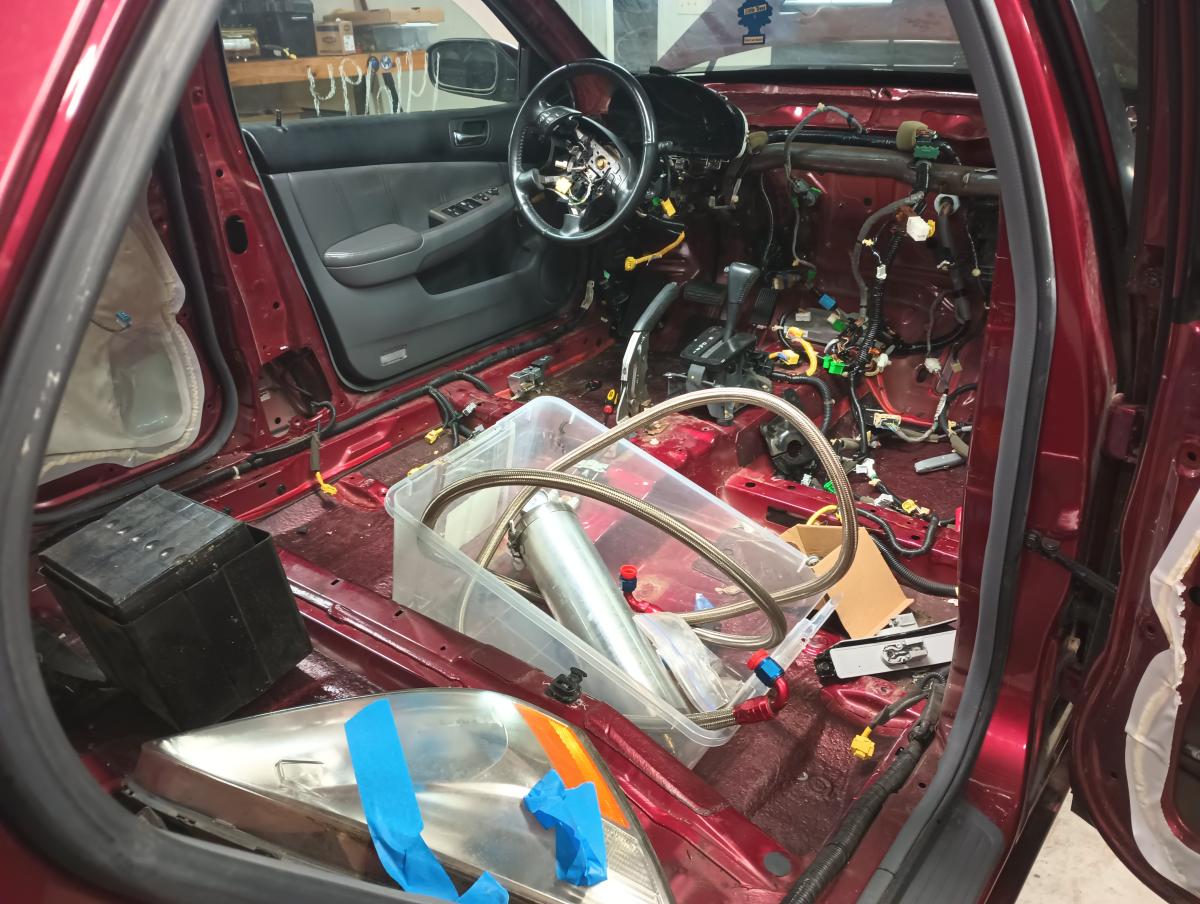
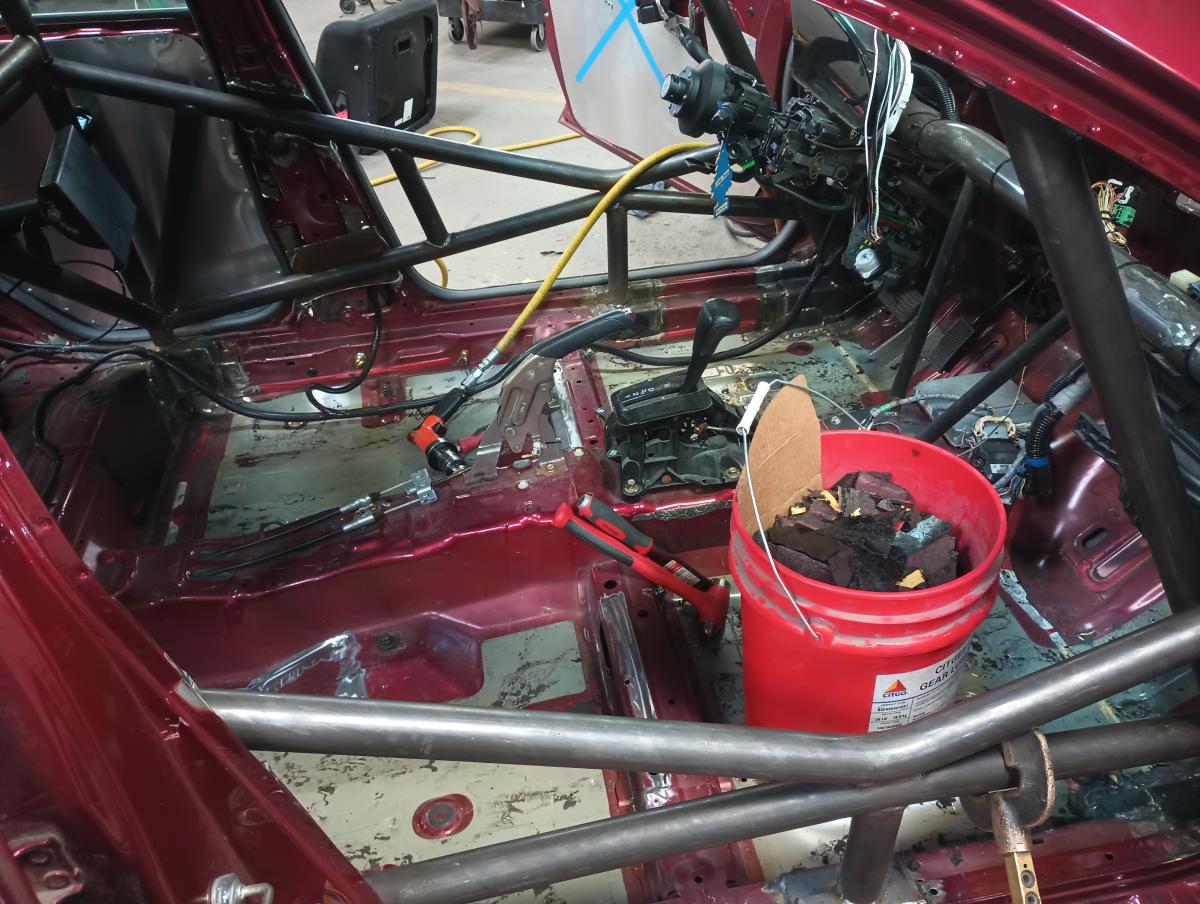
While there were some conerns about gutting the car and getting stalled there, we definitely didn't avoid gutting the car! As you can see, we tore nearly everything out. The purpose behind this was two-fold: Make room to cage the car, and ditch unnescessary weight!
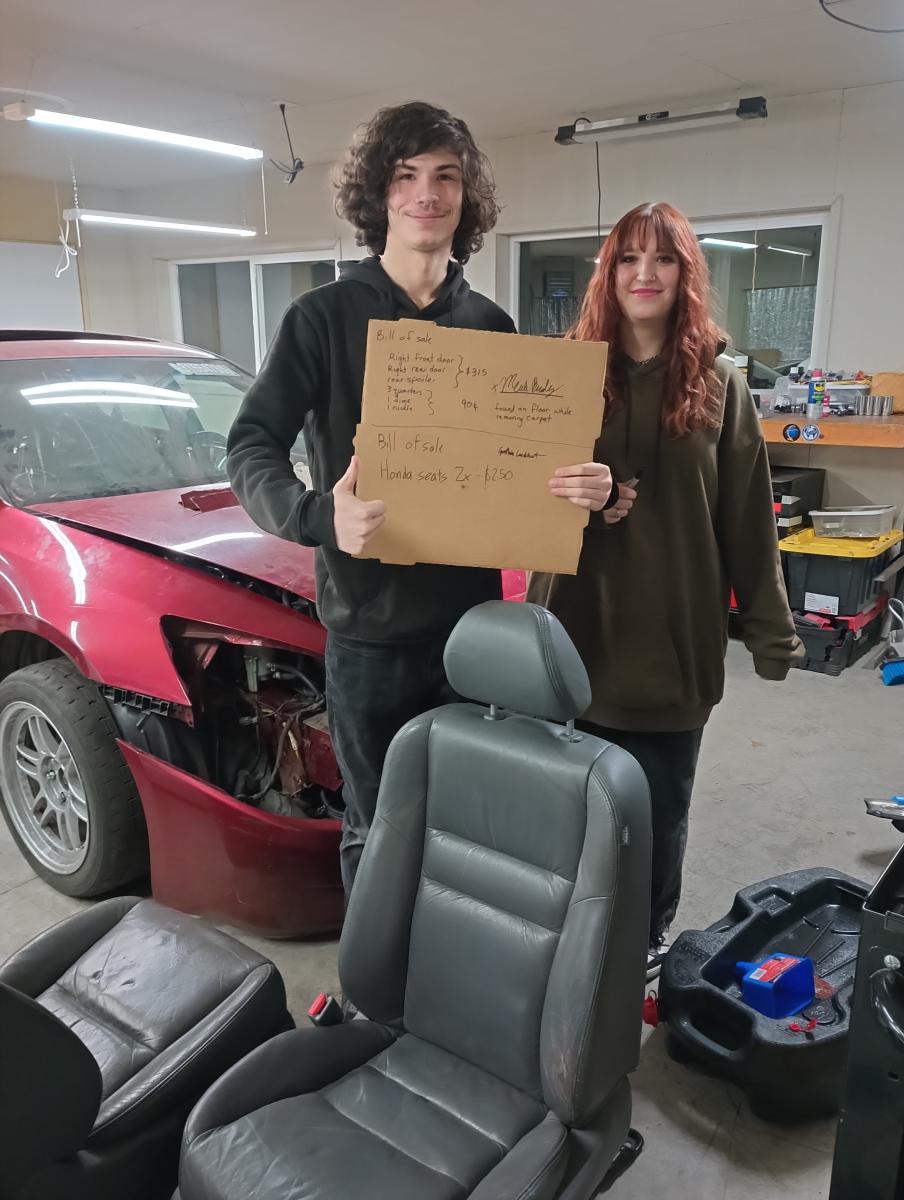
Gutting the car was not only easy, but profitable! This young couple bought our power and heated leather seats for $250! Given that everyone else was trying to get $400 for the same seats, I'd say they did pretty good on the deal and we walked away with some extra money for our car!
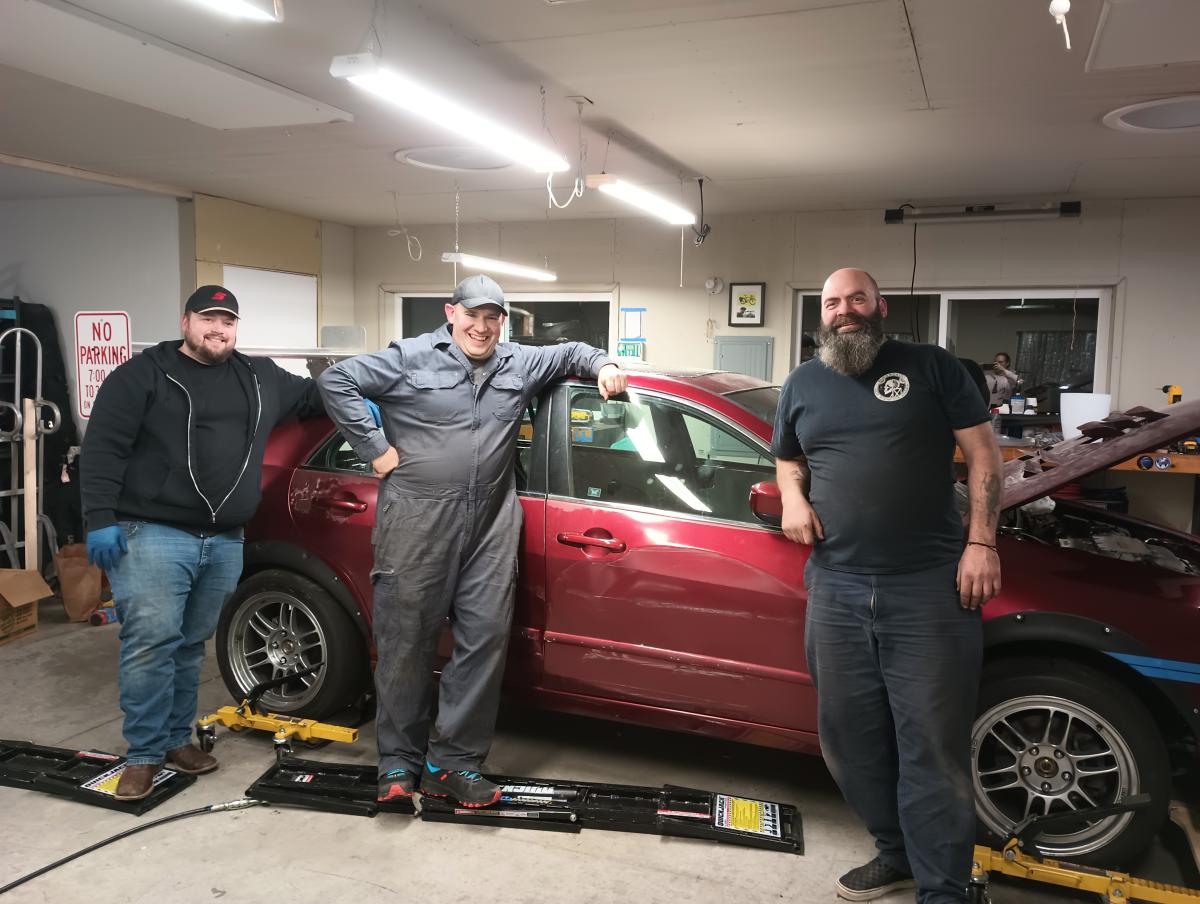
Here you can see Winslow, myself and Dave posing with the car. Yep, I look real derpy in my one piece suit! You can also see how we upgraded the wheels and tires. Welp, turns out those wouldn't fit bigger brakes under those puppies, so we never ran them!
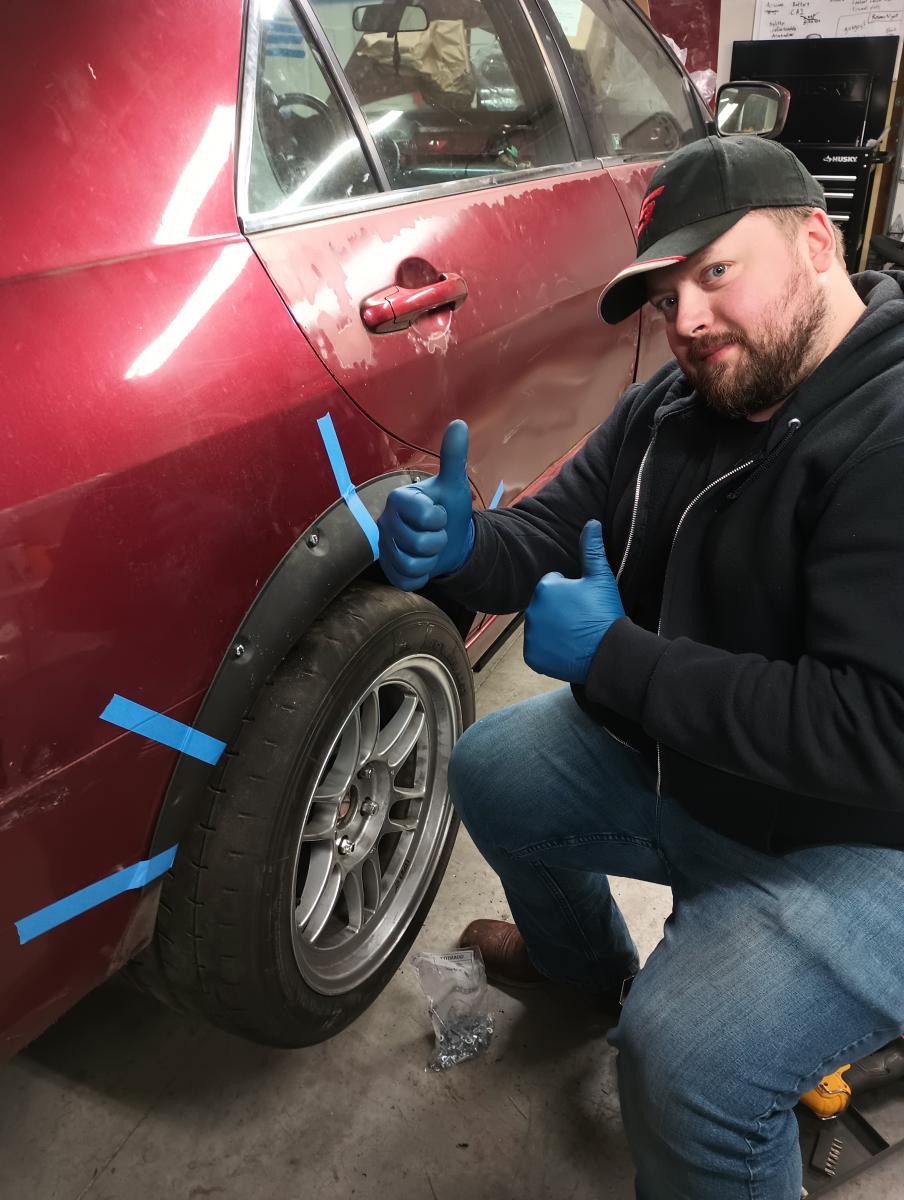
Going to wider wheels and tires is a nescessity for being out on track, hence Lemons doesn't consider wheels and tires towards your budget limitations and considers them a safety item. Consequently, we added fender flares as we knew we'd need to clear much larger wheels and tires. Thank you wish.com for the worlds cheapest pile of assorted fender flares!
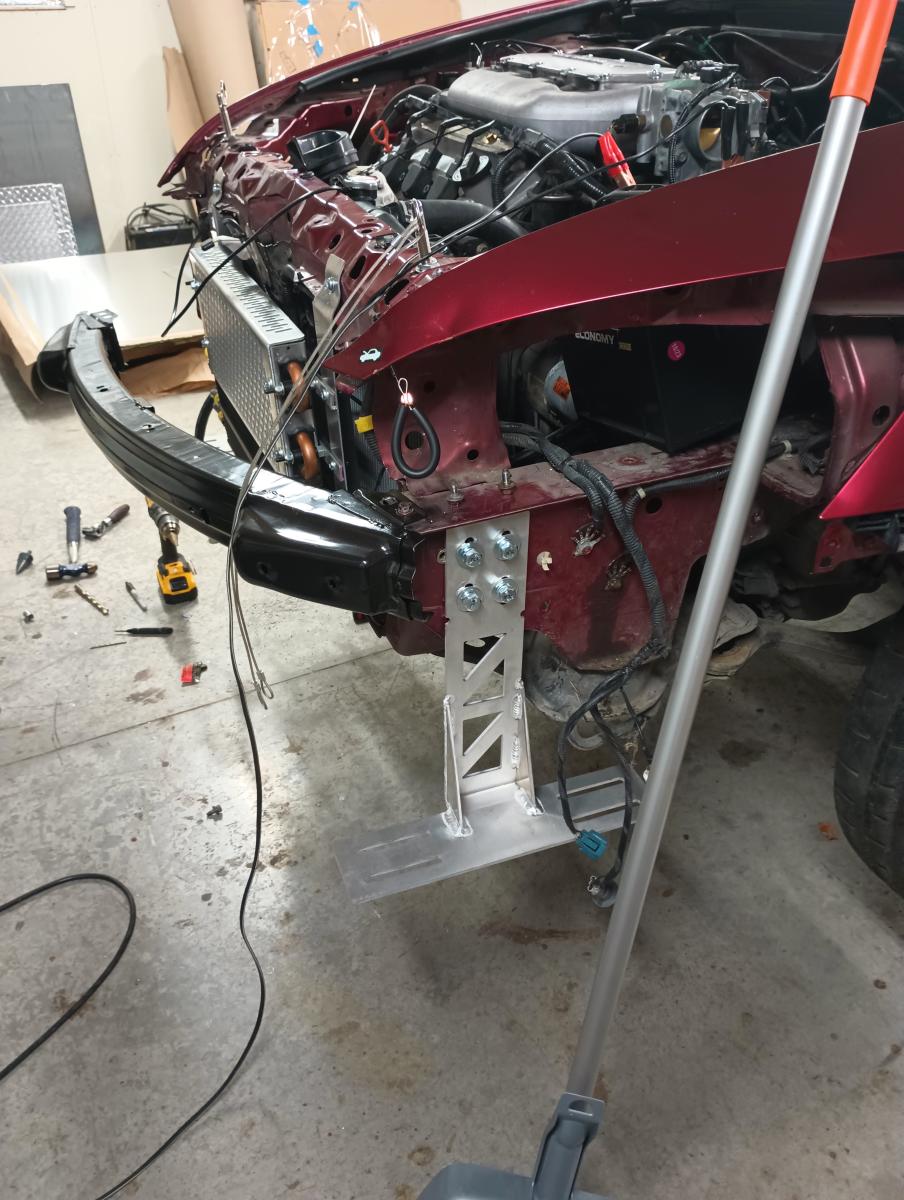
As I recently have taken to producing my own parts for aerodynamics, this seemed like a good opportunity to produce SPLITTER MOUNTS for the Honda Accord. As no one had designed any yet I designed some up and we mounted a front splitter to the car!
Above you can see the front splitter. It's downright silly and excessive, and in the end we did have to cut the size down on the splitter. Also, note that the splitter is made of nature's carbon fiber: plywood.
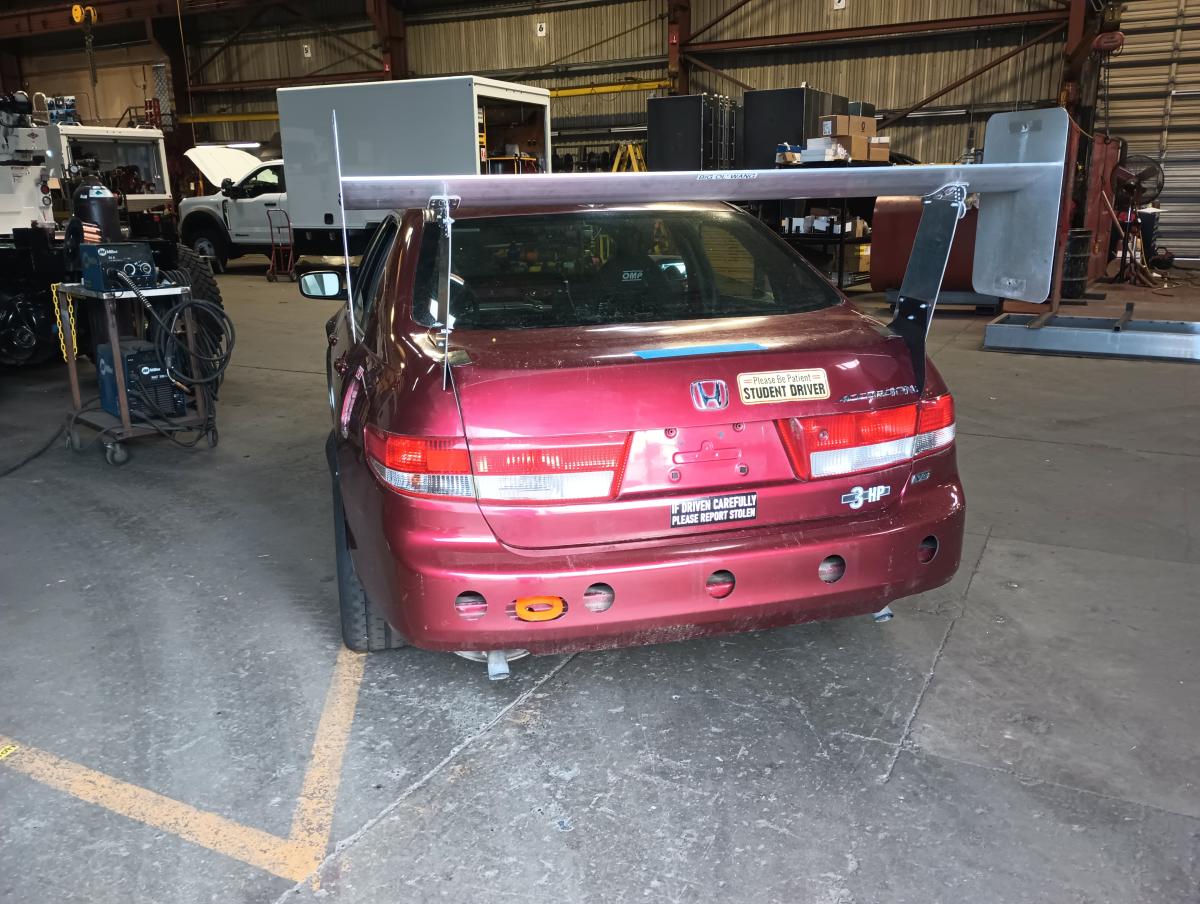
Eagle eyed viewers may have spotted the big wing on the back of the car. Where there's front earo, there's rear aero! We got a scratch and dent returned wing from WingLogic for a killer price, which is awesome as it helped us get aero without breaking the bank! The wing is also tested on my C5 Corvette and a bunch of other places as well so it's a legitimate piece of aero!
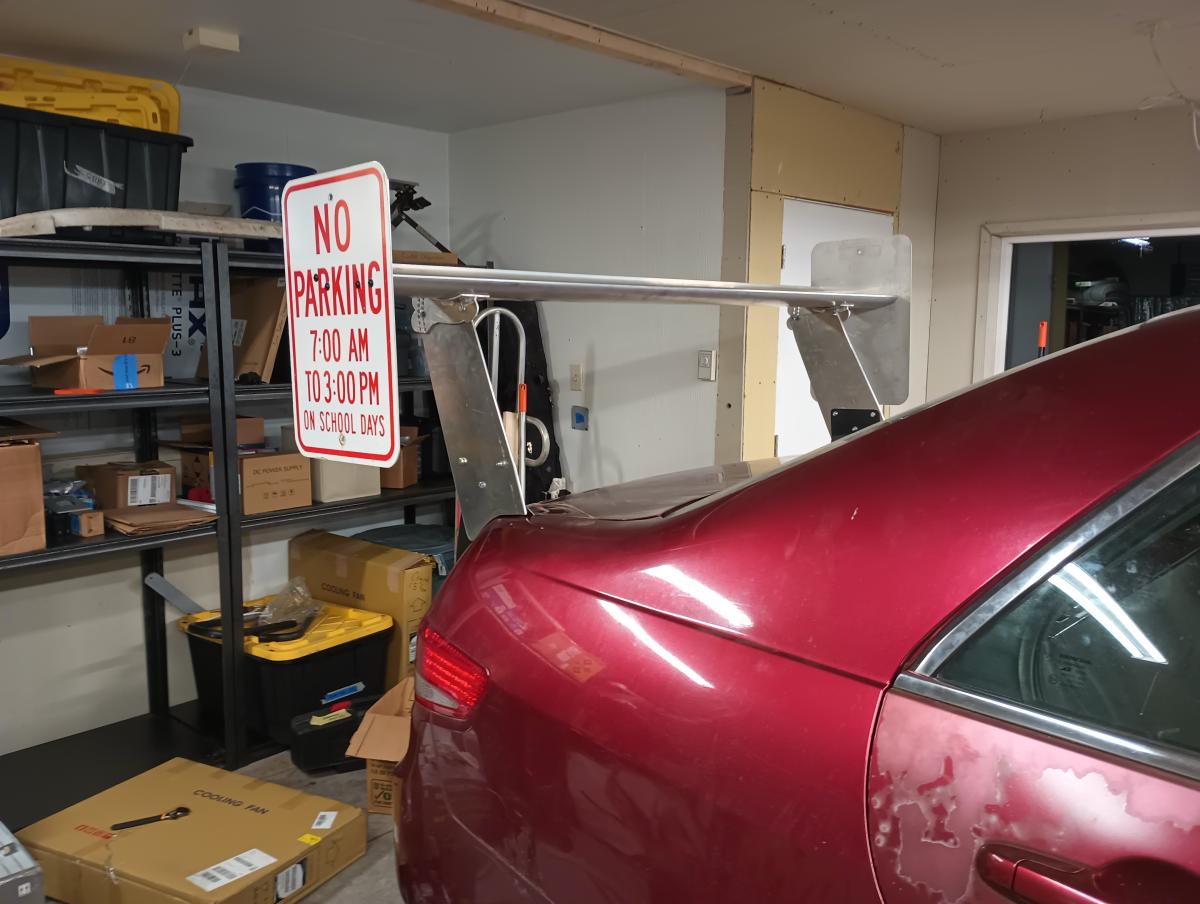
Speaking of wing... we needed endplates, and we found these street signs. We definitely did not steal them. They were for sale at a yard sale in my neighborhood. Eagle eyed viewers will also notice the "wang" mounts, which we made in tribute to a particular aero manufacturer calling their setups "big wangs".
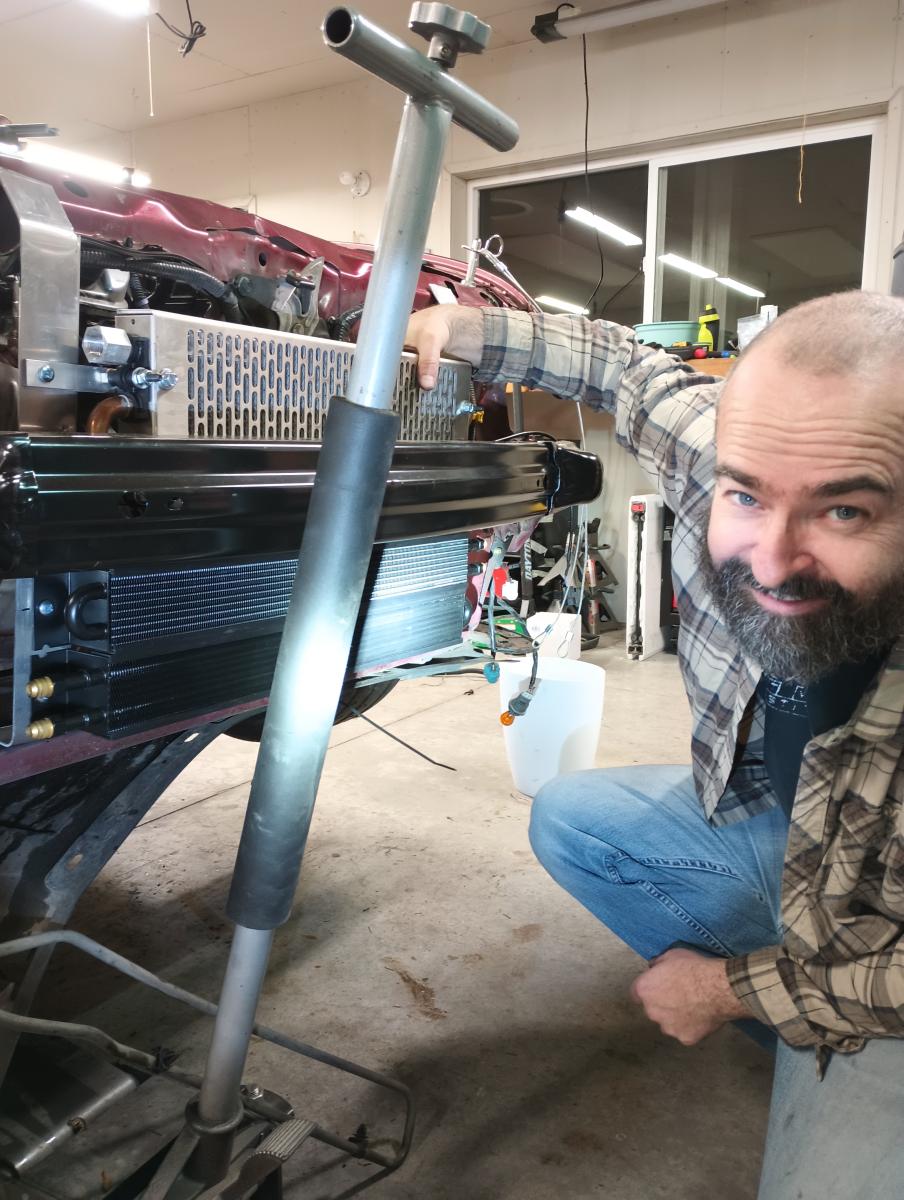
Another thing a good track car needs is cooling. This car was design to safely and in a fuel effecient manner transport children to a soccer practice, not drive in circles aggresively for a dozen plus hours straight. Fortunately for us, Summit had a black friday sale on some cheap coolers, and we were able to get ourselves two coolers with 6an connections for $26ea, shipped! The Accord didn't come with a transmission cooler, which is bananas, so we added a transmission cooler in. Then, there was sort of a power steering cooler in the form of some pipe run in open air below the car, so we swapped that out as well! Then, just for the sake of overkill, we tossed an oil cooler on there that was a remnants from a repair on another vehicle. While it looks fancy and heavy duty, it's 8an not 10an, so it's not as heavy duty as it appears.

Dave definitely helped carry our team a ton, and one thing Dave definitely helped massively on was diving head first into and then spending longer than any human being should snorkeling around the electric and electronic systems of the Honda Accord.
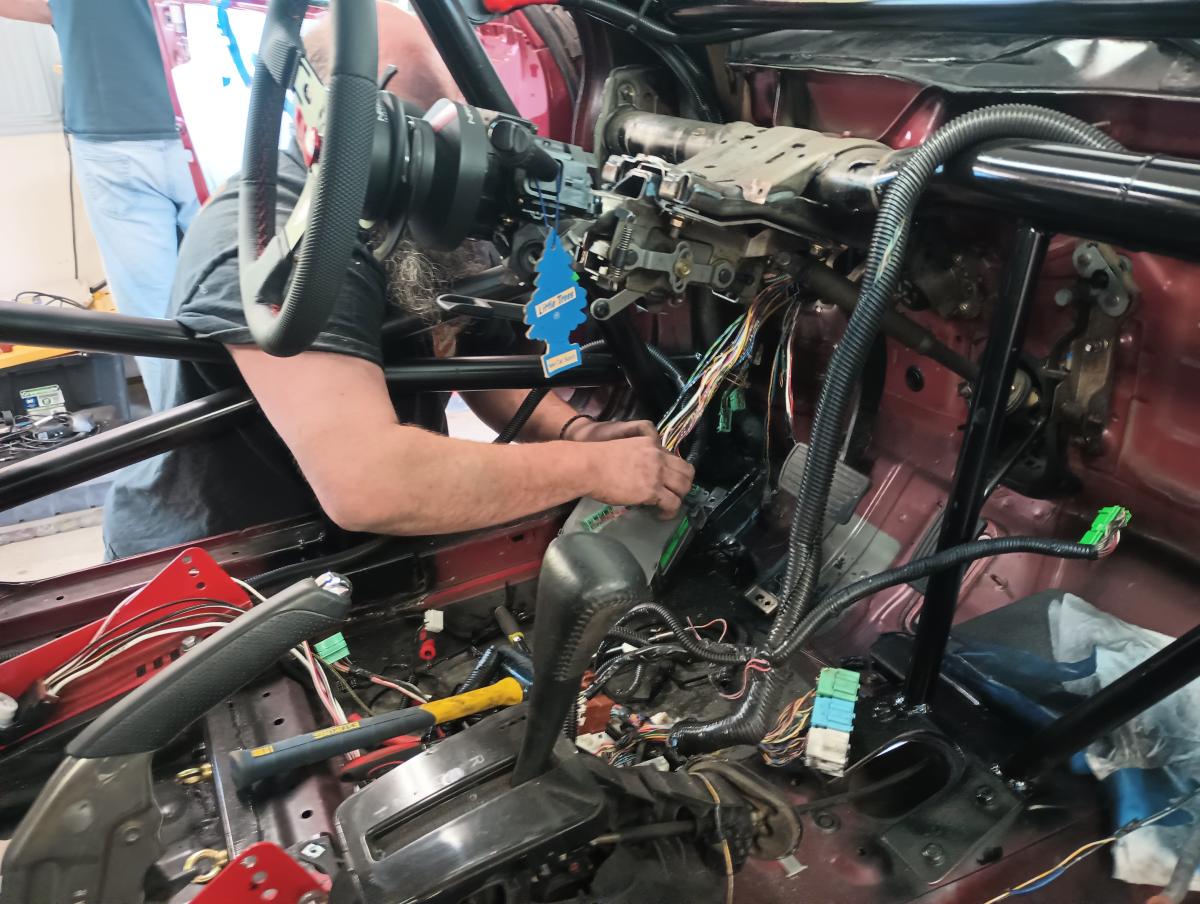
Dave de-pinned the entire system of all useless wiring, and then when we ran afoul of the electronic security system he spent weeks ensure we could get around the problem. No key needed anymore though as we have a switch for ignition and a push button start!

This is a trash bin entirely full of all the excess wiring on this car. Considering it shipped with a DVD player in the back and all sorts of other features like GPS and what not... it all had to go!
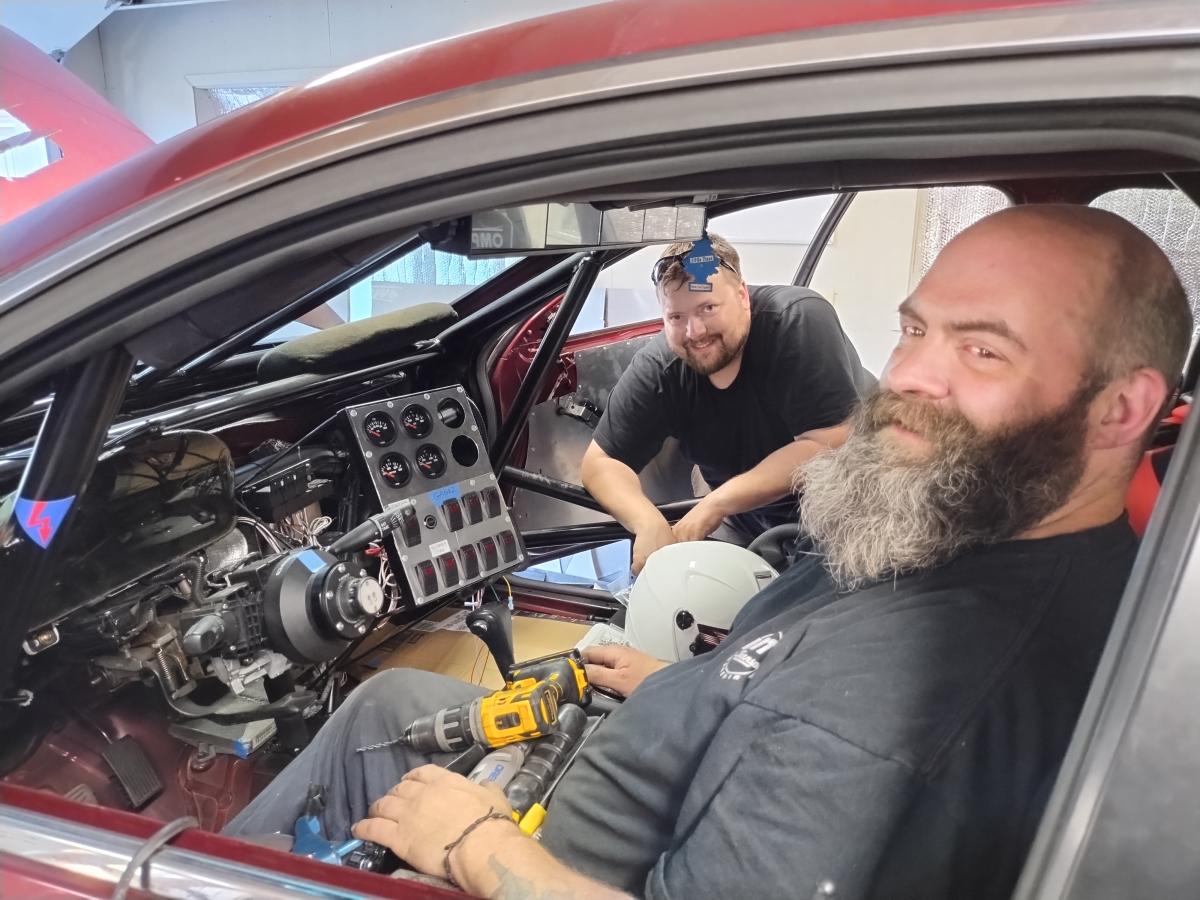
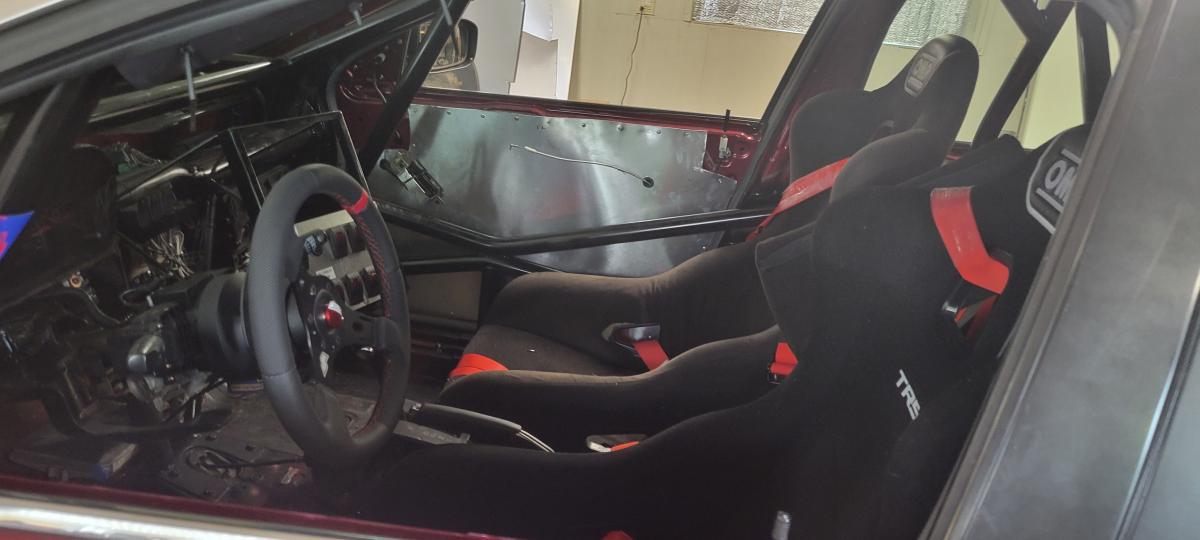
Speaking of electronics, here you can see all the wiring Dave put in and the Gauges that Winslow tackled as well. We've got oil pressure, oil temperatue, trans temperature and coolant temperature all off their own gauges. While there is still the factory functionality in places, we've at least got gauges to reference to confirm any suspiscions we may have!
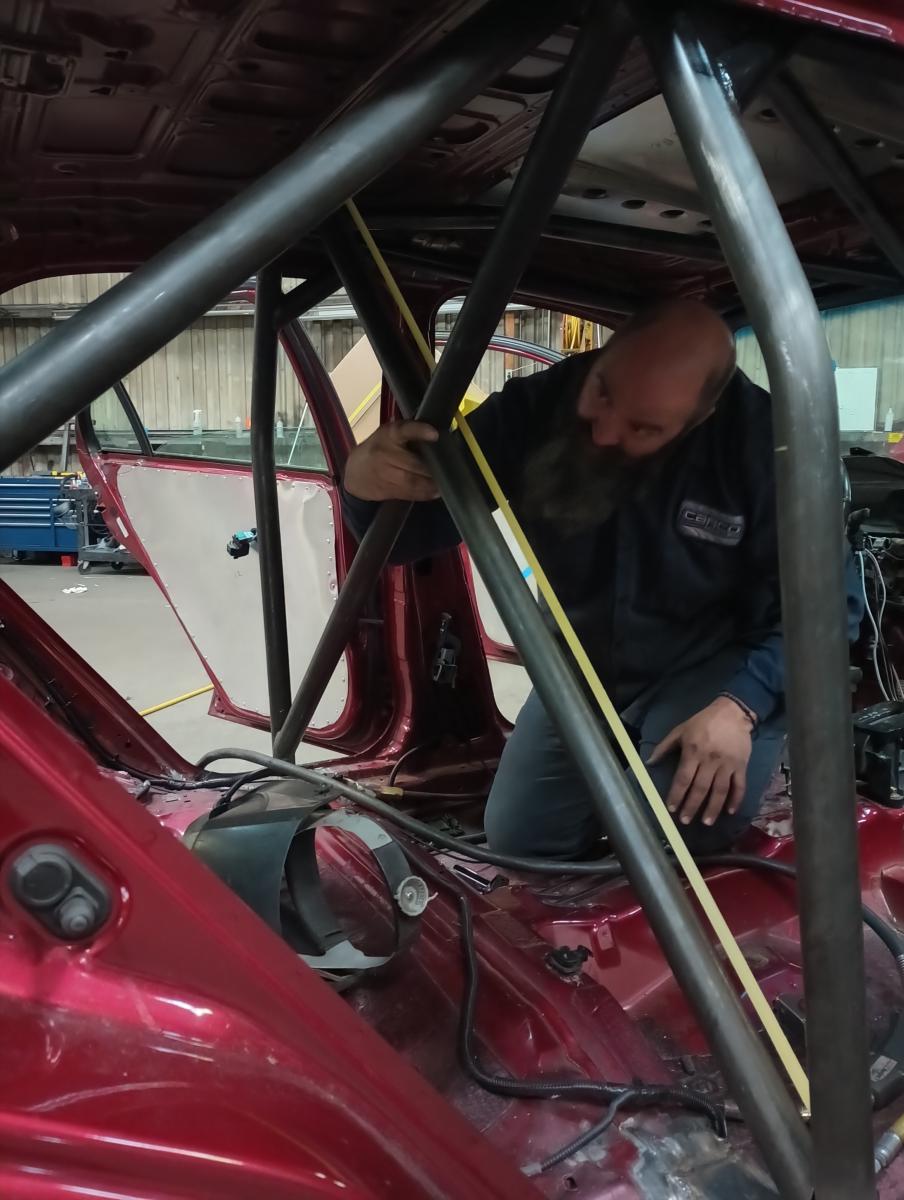
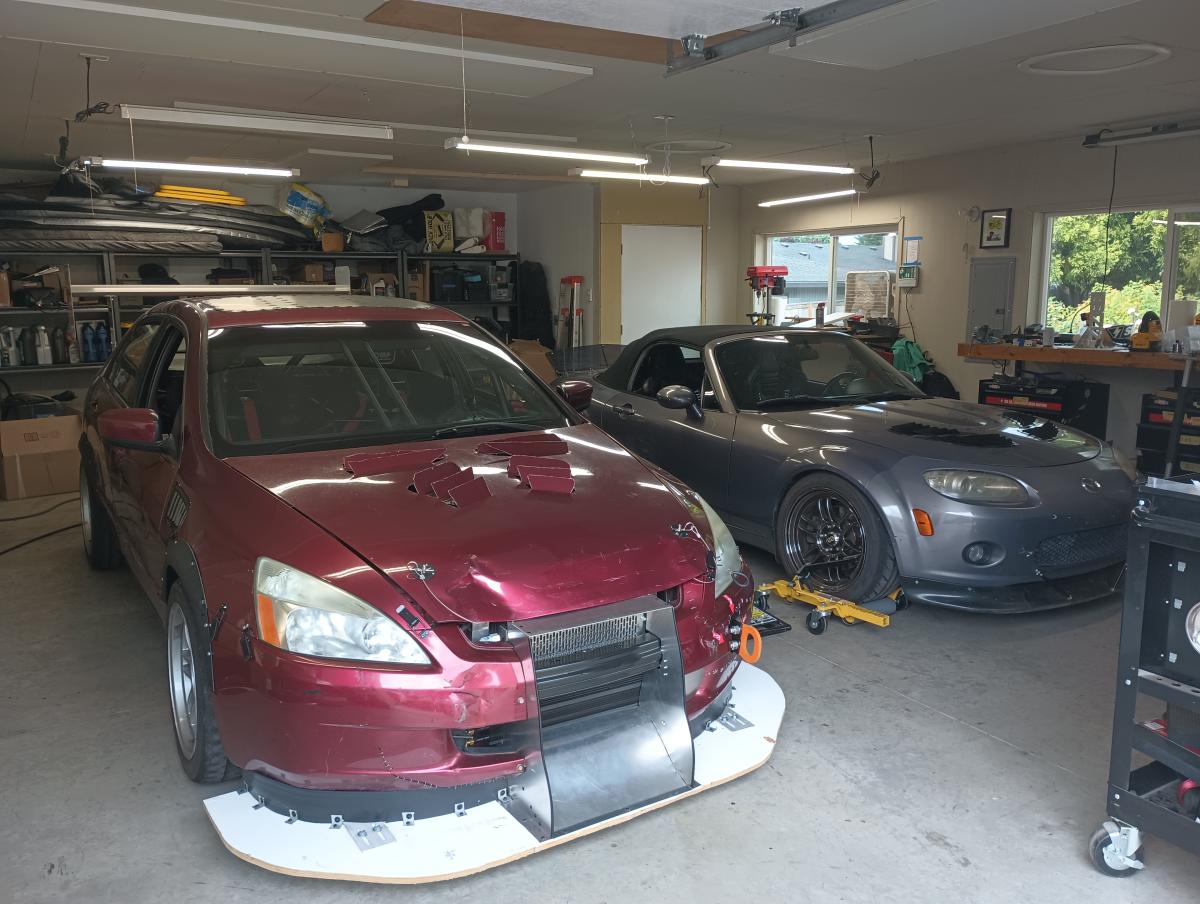
At this point, we'd tackled most of what we reasonably could as a team, and it was time to send the car off to live at Dave's shop while we got the roll cage installed. Dave's shop was gracious enough to host the car for a while as we installed the very heavy duty and overbuilt roll cage in the Accordian!

While in Lemons if you stay under 3000lbs you can go with a smaller diameter roll bar, we decided to just go straight to 1-1/3" bar right away.
Lemons also does not require certain features like a dash bar, while other series we may want to try such as Lucky Dog require one. So we went with outright overkill and caged the heck out of the car with two dash bars, an anti-intrusion bar, FIA bars and all sorts of other solid bits to ensure we stay safe and pass tech easily.
Seriously, we overbuilt the heck out of this puppy!
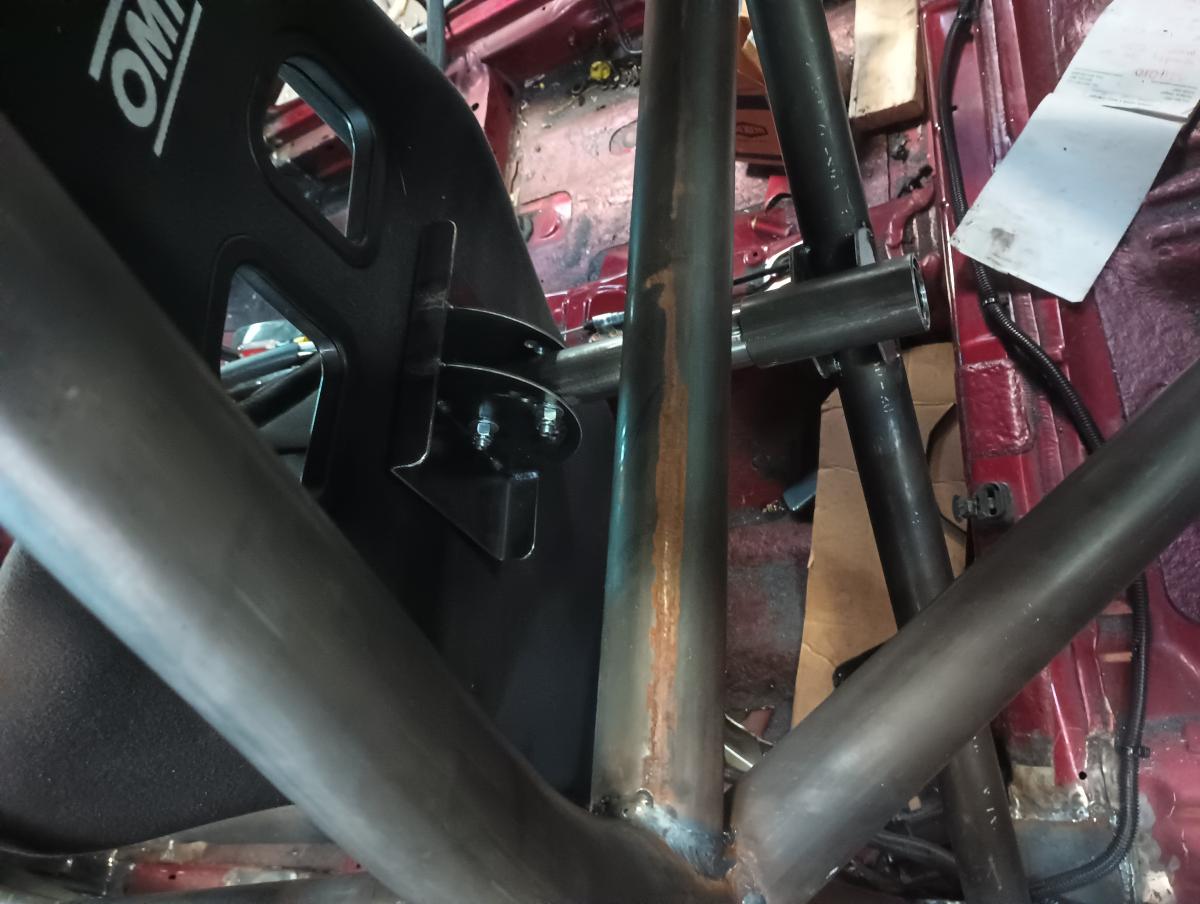
Just look at how intense that seatback brace is!

Speaking of securing... look at how secure that battery is located all the way in the trunk! Also, shout out to my Corvette for donating it's old battery to the Accord. It's nothing special and not even AGM, but it did save me from having to go buy a battery!
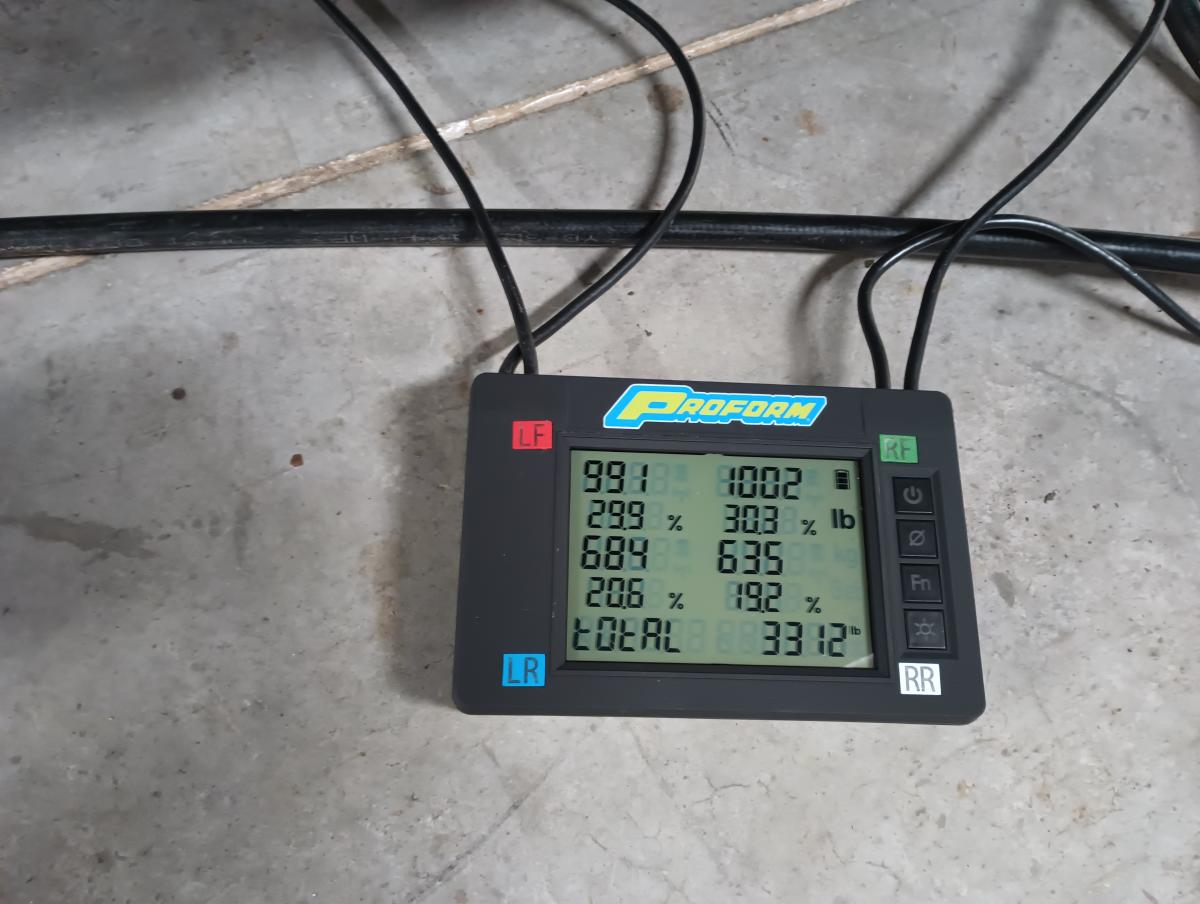
All that steel adds up pretty quick though, and once we got the car back having the cage installed it weighed in at 3312lbs! That's more than my Corvette with way less tire and notably skinnier tires!

With all of the general bits tied up and a working and running car, to ensure the first phase of the car was nearly complete we decided to enter the Accordian into an Autocross event.

I drove the car in the AM and Dave drove the car in the PM. It did surprisingly well, allowing me to take first in Novice and Dave earning 3rd!
Above is video of Dave tackling the autocross course. I'm not sure if it was his fastest run, but it's the one I captured with video from my phone. Speaking of, that clearly demonstrated to me the need for a GoPro mount so we could capture all of the fun shred!
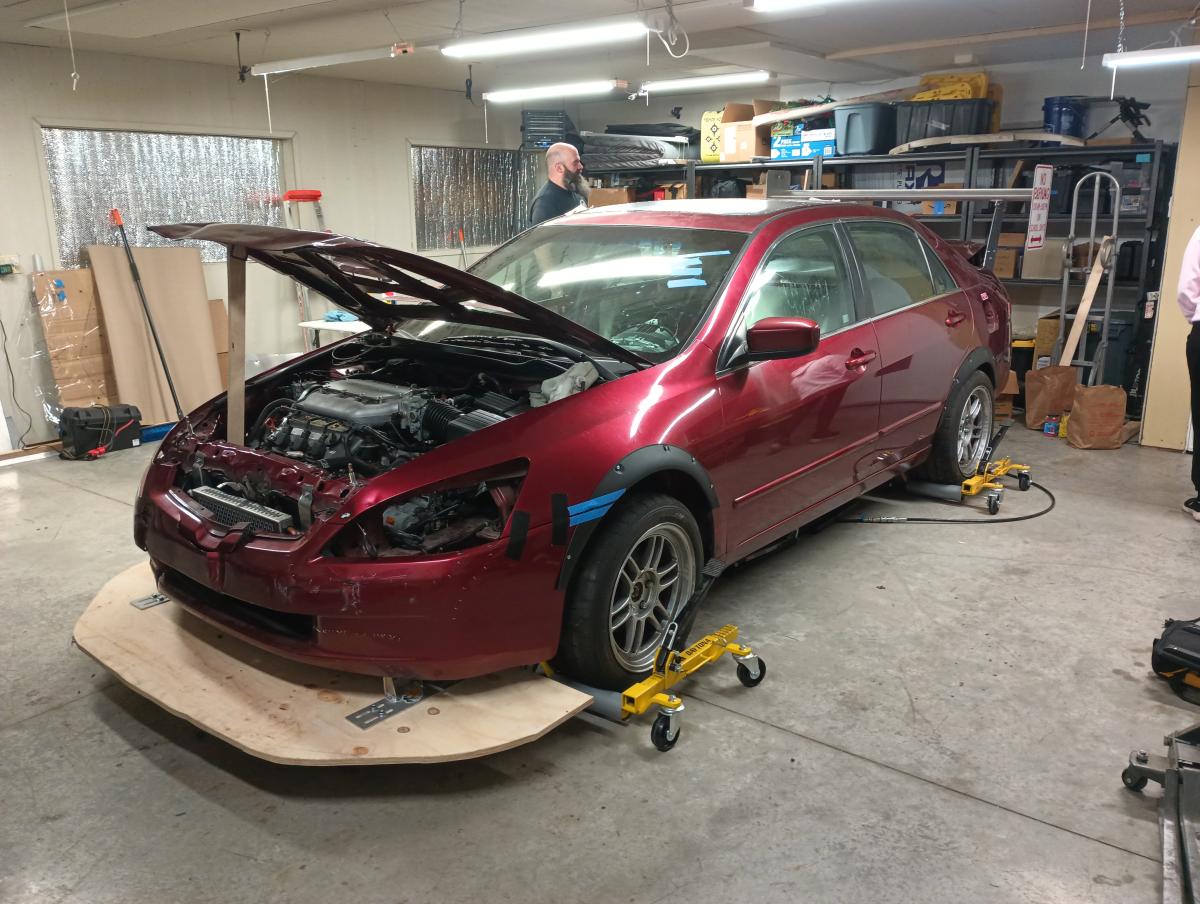
After the event, we brought the car back and gave it a quick lookover and determined we only had a few minor things to tackle. We revised the splitter mounts to be 1.5" shorter (IE: 1.5" more ground clearance) as under heavy cornering and braking the splitter would drag on the ground along with it made loading the car and navigating all but the smoothest of transitions very challenging.
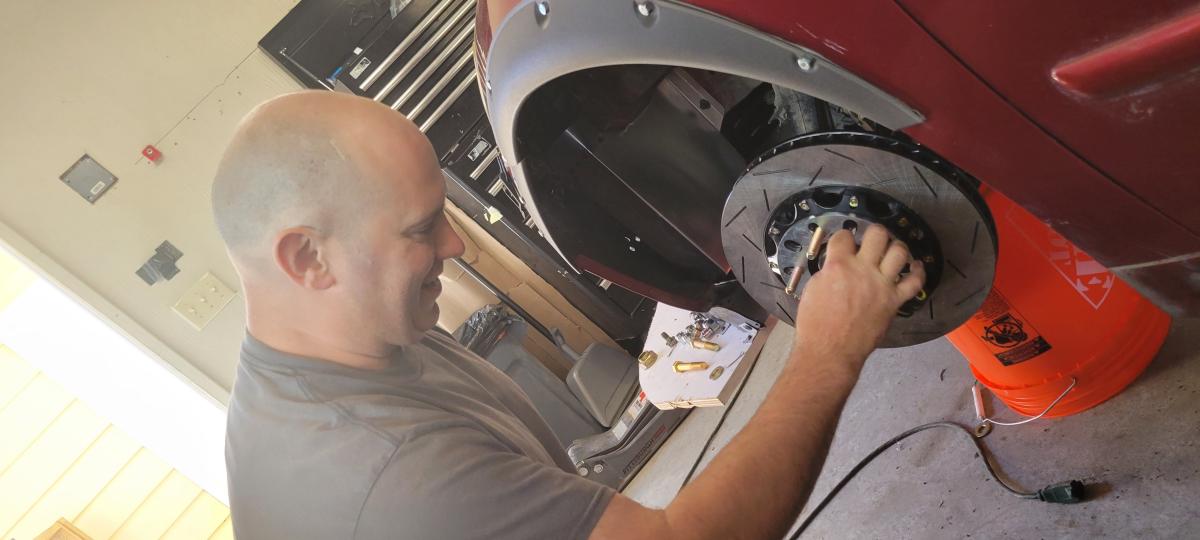
Another thing we decided to tackle, was upgrading to larger brakes. Larger brakes means better stopping power plus better heat dissipation and brake fade resistance. There wasn't much information out there on big brake kits for the Accord, but cross referencing a few other models that supposedly are the same and a failed attempt at brake purchases later... we got ourselves some track worthy brakes! Plus, added bonus as safety items these don't count against our budget!
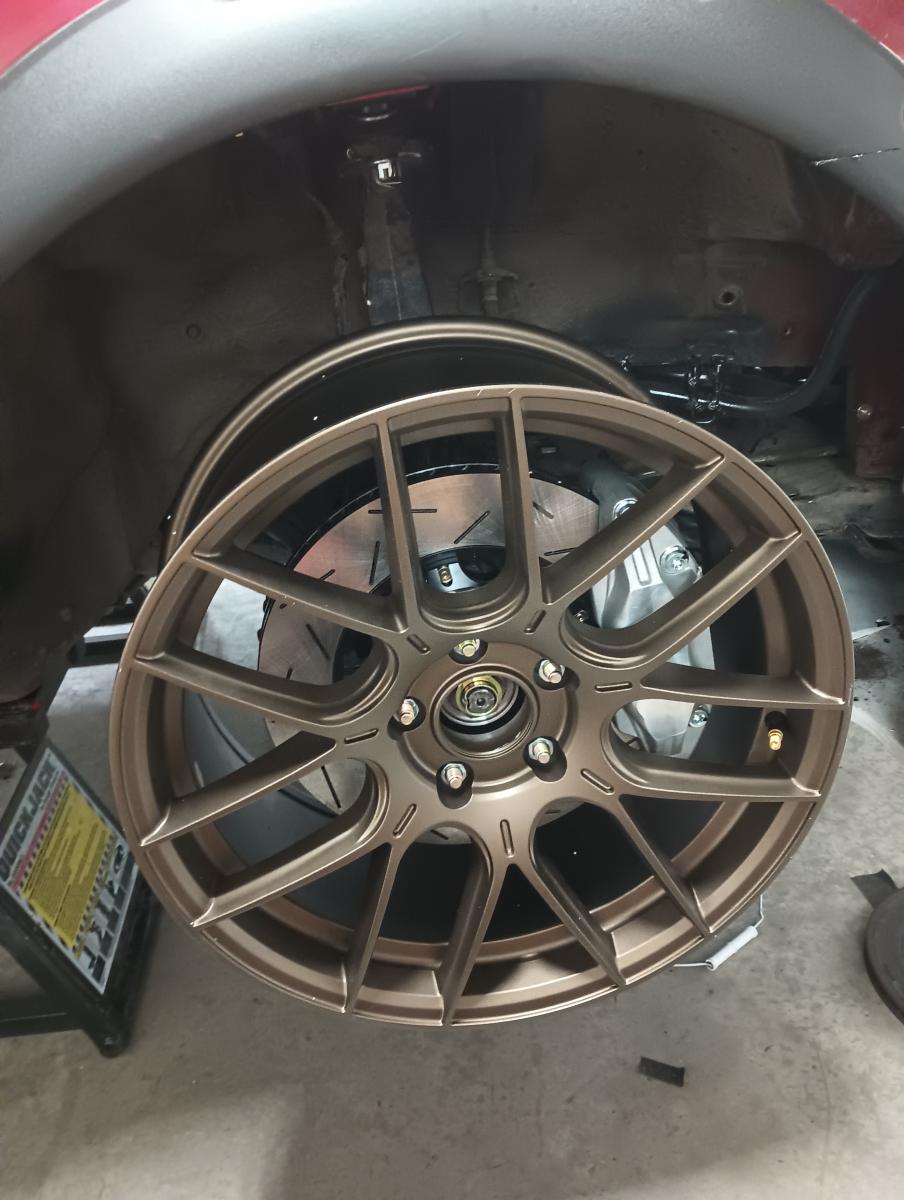
Information on racing the Accord is non-existant. I will often say that the only people modifying these are to look cool at the mall, and consequently there's no meaningful informaiton on legitimate upgrades to these cars. Therefore, there's even less information on things like "What wheels will clear big brake kits" on these cars. Fortunately, after a lot of trial and error we got Aodohan AH-X wheels in 18x8.5" that cleared the rotors with the help of just a small spacer. Infact, they have so much clearance that if we could find 14" rotors we'd clear those as well!
Next up... time to see how it does on the track!