Track Day 37 + 38 - Ongrid Time Attack at The Ridge Motorsports Park - Kooks Long Tube Headers and Professional Awesome Bump Stops
Leading up to the Time Attack Event
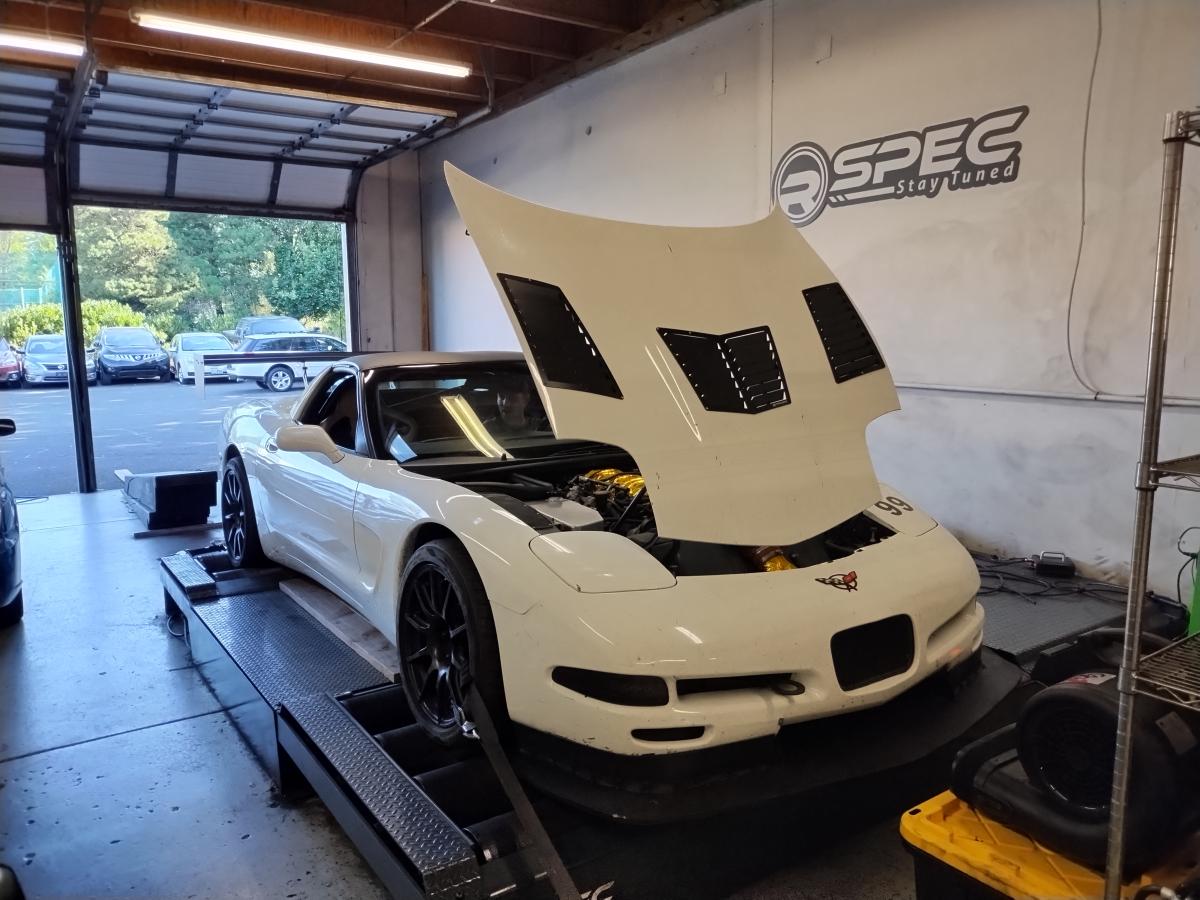
Leading up to the event I had a few ideas I wanted to tackle in the hopes of producing some additional power. Specifically, I'd purchased some Kooks 1-7/8" long tube headers I wanted to put on the car, and then tackle some sidequests while I was at it. This wound up a major major debacle.
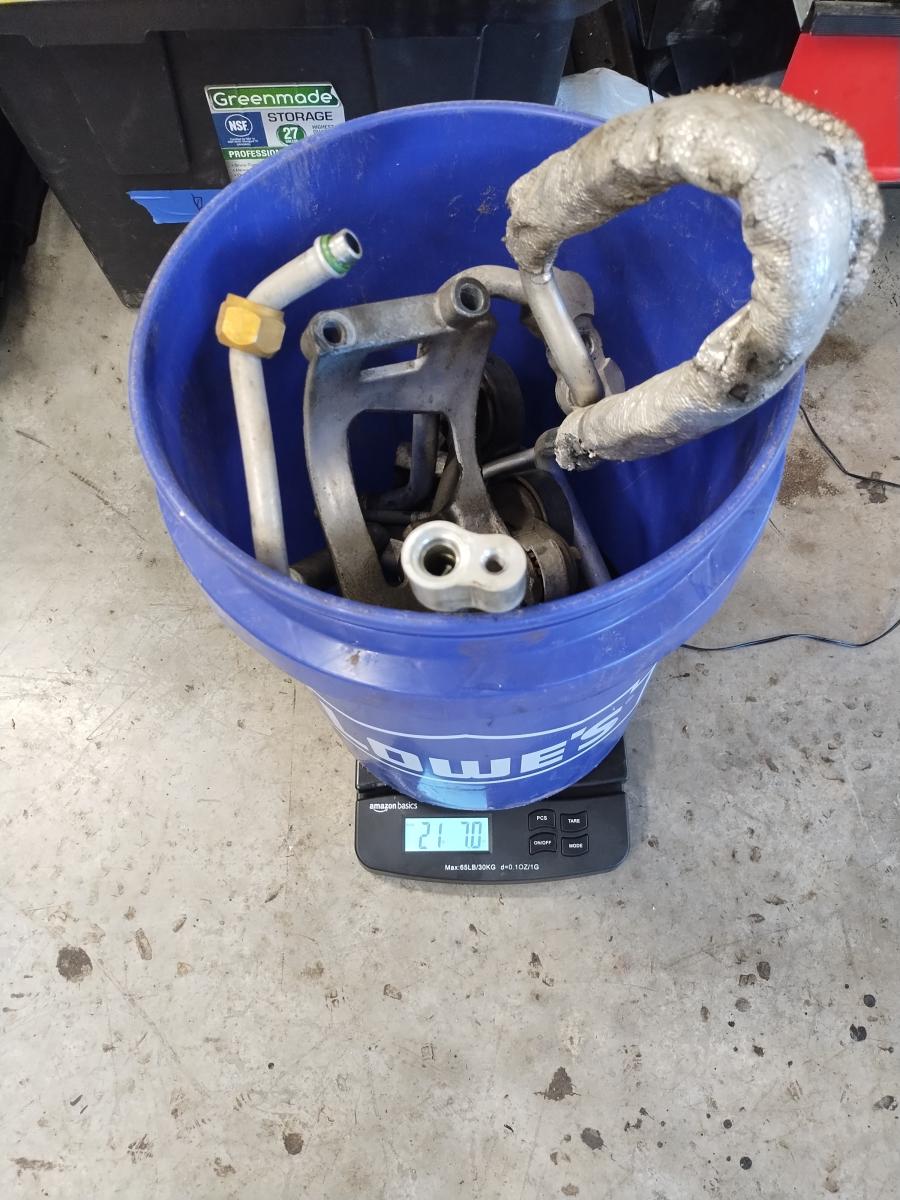
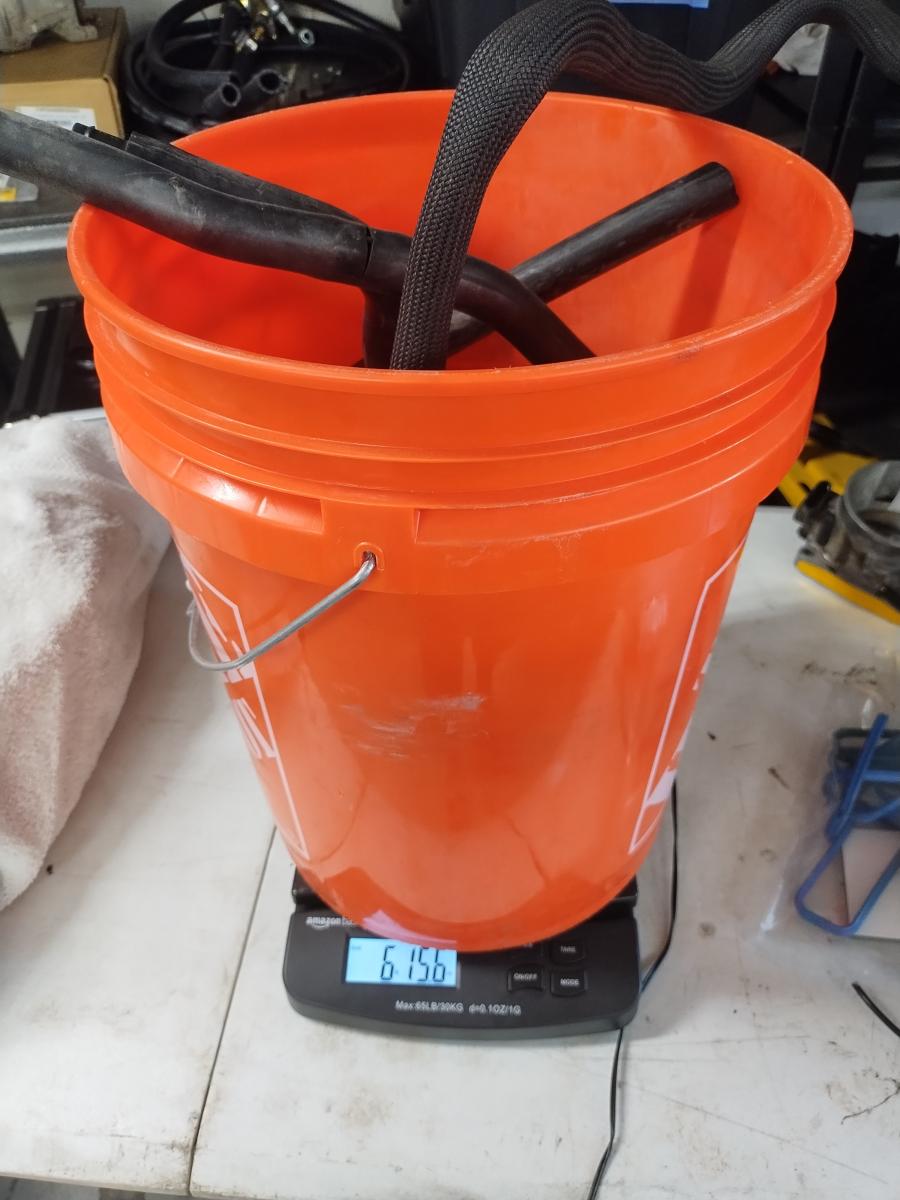
While I was in there I figured I'd continue the C5 Corvette weight loss... I pulled the air injection system for a weight loss of about 6lbs.I also pulled 21lbs of AC (30 after removing idler assembly for the compressor) so there were some notable weight savings to be had.
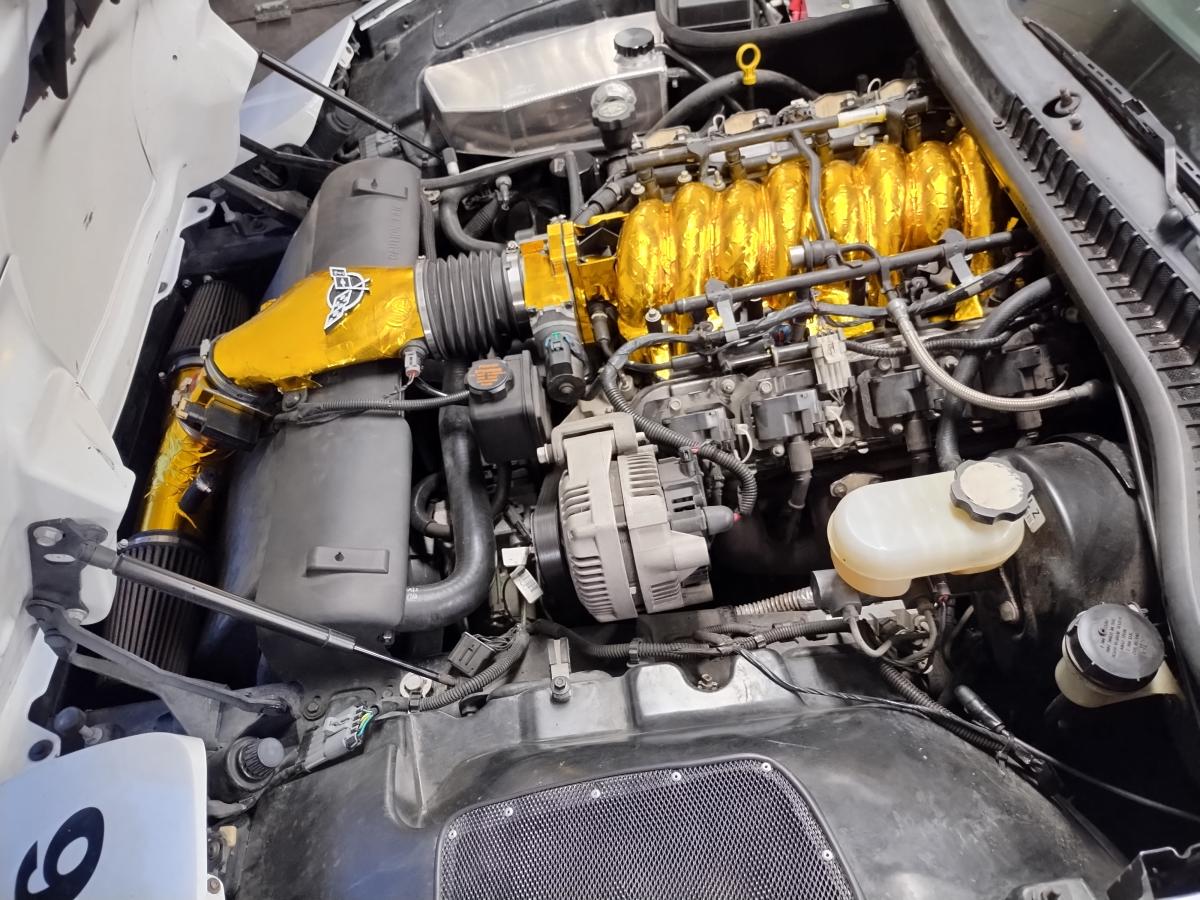
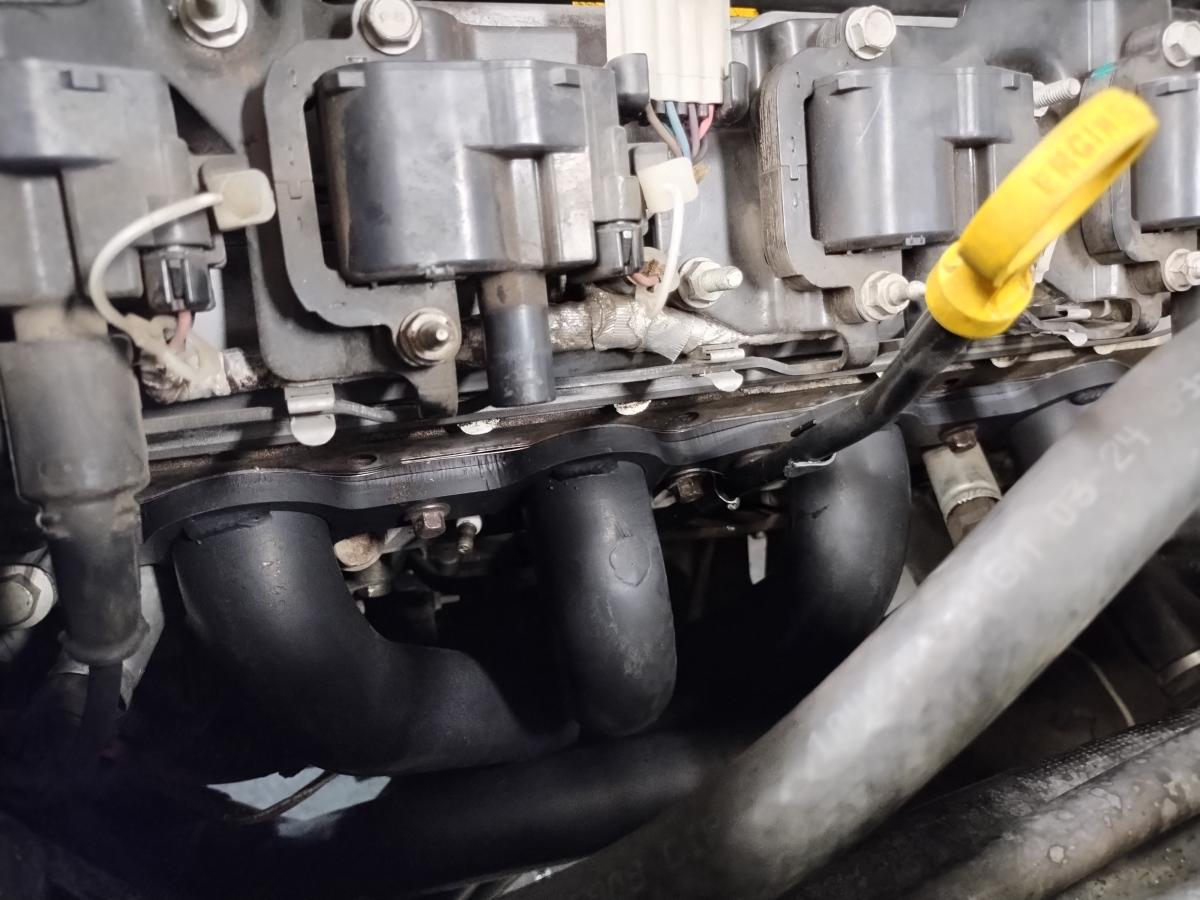
As for producing extra power in the C5 Corvette, a new LS6 intake and long tube headers along with a full catless exhaust came together to result in notable power gains across the entire RPM range. Unfortunately my dumb butt forgetting a secondary O2 bung on the long tube headers derailed us for a solid 4-5 hours while we were troubleshooting why one bank was running so much leaner than the other. With only 40 minutes to tune the car, we threw enough of a tune on the car that it wouldn't explode and would survive the weekend.

Peak power improved 13ft lbs and 10.65hp, but with the most significant gains being in mid range where significant torque was picked up. DFCO (deceleration Fuel Cut off) is off a bit though and results in some pretty wild pop/bangs that sometimes make me wonder if something is falling off the car!
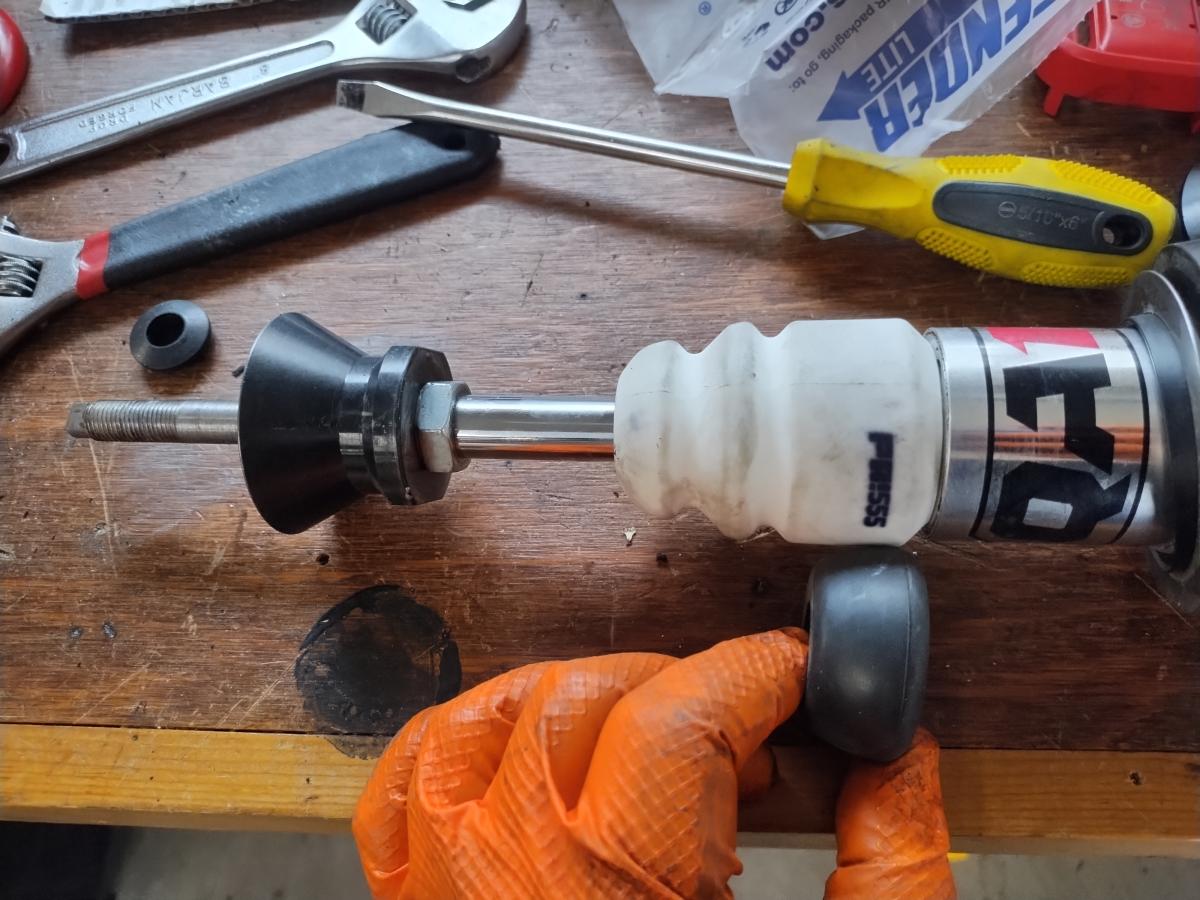
Other modifications of consideration on the car were that I put a Professional Awesome bump stop in the passenger side front coilover. It might seem silly to do just one side... and you're right. I ordered one thinking I'd ordered a pair. I figured though at least having one on the outside would be helpful. Spoiler alert, it went fine, and another bump stop arrived yesterday so I can do both sides before the next event.
How The Time Attack Event Went
Going into the event I was nervous about two variables. I wasn't 110% confident in the single bump stop up front not causing imbalance, and I wasn't perfectly confident in the tune as we rushed it onto the Corvette.
Getting out on the track though it definitely all worked out. I was able beat my personal best by a whole second, running a 1:51.5.
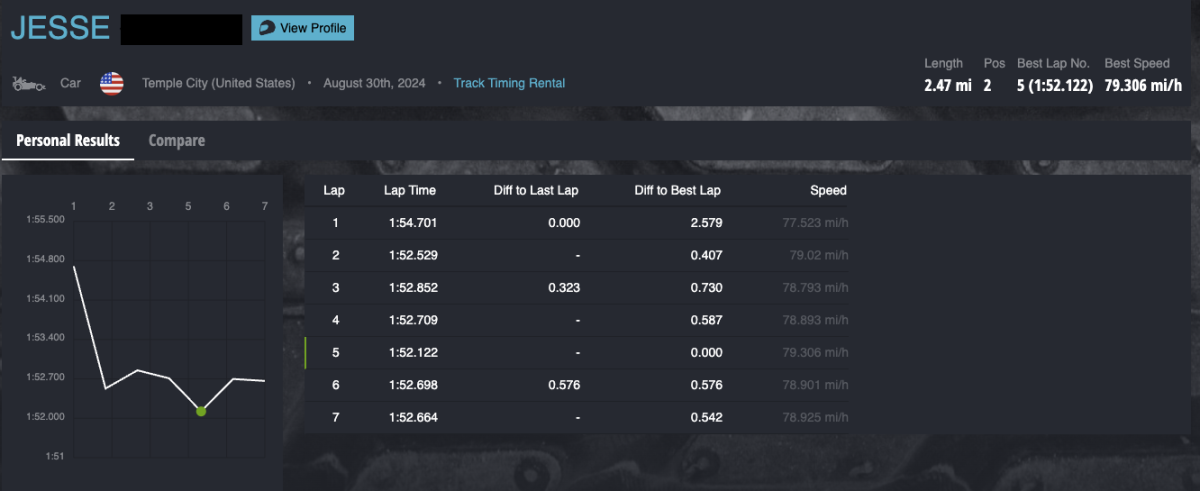
I also ran an entire session full of 1:52 laps, which I could only previousl accomplish as a best lap of an entire session. That leads me to feel pretty confident i can run 1:52's with bests of 1:51, which is a consistency I feel confident in.
I wrapped up day 1 I in grid position 1 for the Time Attack B group, and sitting in 4th place for GT+ class with OnGrid. I was in 3rd right up until the last session where the fellow who was a hair slower than me went out and turned only 3 laps, but one of which was a 1:50 and thus eclipsing me for 3rd. As much as it annoys me that I can turn laps at a quick pace the entire session and they couldn't... that's not what matters in time attack. It's the best single lap all weekend long.
Comparing numbers to my previous personal best (data logged)
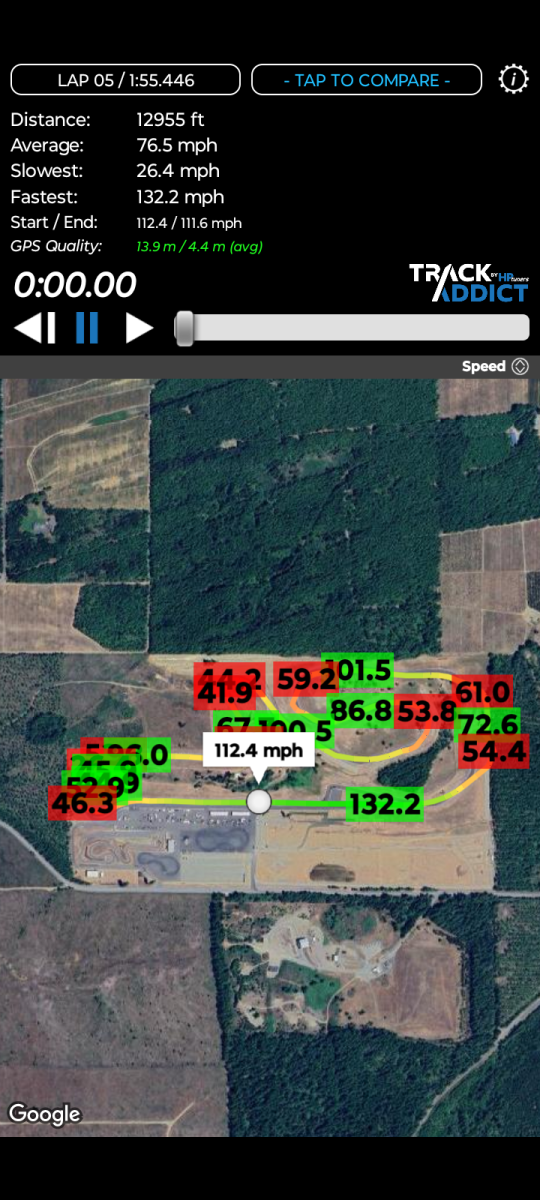
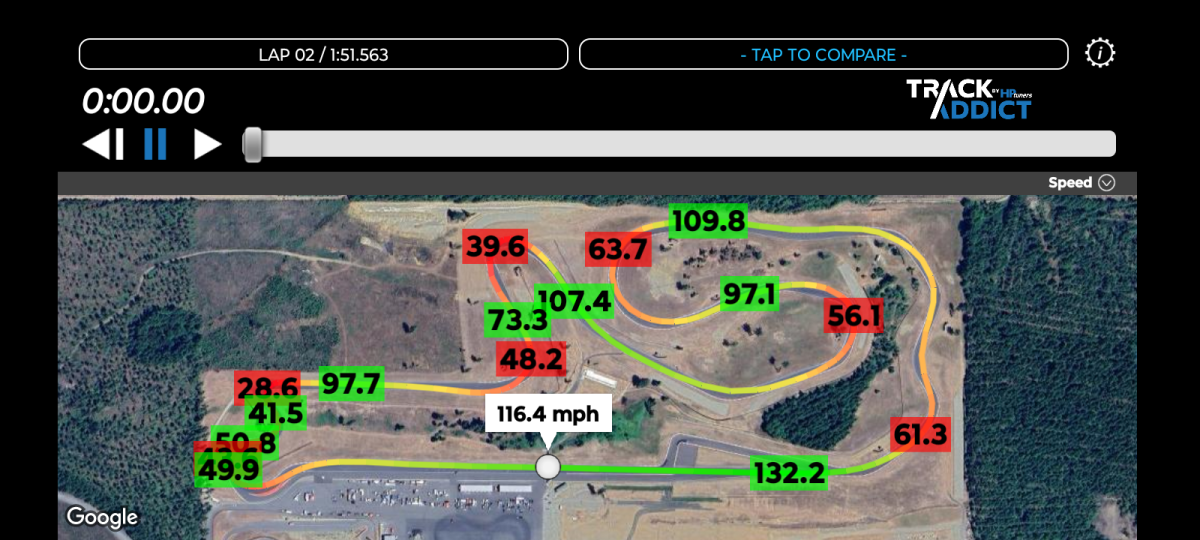
So to start with, let me just say that my previous personal bests here were all logged on GoPro, as I'd yet to add the dedicated track timing to the C5 Corvette. Thus, the best data I have is of a 1:55 versus a 1:51. That said, I've got some significant gains to show between them. Between turns 5-6 I'm up 9mph. Between turns 6-7 I'm up 11mph. Between 9-11 I'm up 7mph, and between 12-13 I'm up 11mph as well. So in general, on nearly all of the straights I gained 10mph on average. These are pretty significant gains!
Finishing the Event Out
Unfortunately, I ran into a mechanical issue in the late afternoon of day 1. My brake booster developed a leak, really messing with my braking ability. I no longer could brake with the same pressure nor with the same control as before, resulting in me no longer being willing to trail brake nearly as far or deep into the corners. Consequently, I had to back off significantly and only ran a best of 1:53, and while I turned many 1:53laps, that did not improve my overall weekend time, and had me gridding 5th in group B.
I'm still awaiting the official results to post, but reviewing the numbers and tabulating them myself I am confident I finished 4th in my category, which was GT+. Not too shabby considering that a C7 Corvette Grandsport with full aero would also qualify to be in the GT+ class, so really... I don't think my 25 year old car placing 4th is all that shabby!
Other things to note that were a fellow instructor with CSCC had their wheel hub SHEER OFF on track, and needed to get his car home somehow. I helped him by winching his car up onto my trailer and driving it home for me. It definitely showed me though a few areas where I was lacking in my track kit. I have since purchased a wheel dolly to bring with me for these sorts of situations, along with some fire extinguisher flares to try and help combat any fire issues.
Plans for My next Event
So some takeaways mechanically from this event that I intend to take forward into the next event and/or future events:
- Improve rear aero. Removing the rear tub notably increased lift in the rear of the car and the car is no longer quite as balanced. Adding a diffuser seems to be the next move to make.
- Add Professional Awesome bump stops to both sides of the front of the car, currently only have installed on passenger side (outside of CW track like this one)
- Fix brake booster, or hope replacing check valve takes care of the issue.
- Swap on new tires
- Swap out rear brakes and rotors
- LS6 valley pan (long term for sure, I'll do this when I do heads and cams)
Some personal driving takeaways:
- Driving without a working brake booster showed me how I can improve my heel toe technique. I often make the heel toe shift but keep govering the gas pedal with my foot, reducing my ability to brake. I couldn't get away with that with a bad brake booster, so I had to do the shift and then get back to fully stomping on the brake pedal. In general I should get the shift over and then focus on the brake pedal.
- I am debating how to improve these sections:
- Turn 6 exit over the hump at turn 7. I run wide exiting 6 and use all the track there, then start cutting back accross the track accross 7 to set myself up to make 8 as wide of an entry as possible. It doesn't feel confidence inspiring coming over 7 while turning, and if I lift or brake at all (such as if I am coming up on somebody) the rear gets really light.
- Turn 8a-b I'm just inconsistent and I don't know the fastest way through there. I in general try and not inside apex 8a, and try and maybe catch 8b's inside apex driving wide out. I think just staying wide and carrying max speed in and through would possibly yield the best times though?